
Fiberglass batts, blown-in fiberglass, cellulose, spray foam, rigid foam, and radiant barriers cover nearly every attic in the country, and picking the right one comes down to one rule: seal air leaks before you insulate anything, then match the material to your R-value target and moisture situation. Most retrofits do best with blown-in cellulose or blown fiberglass because they’re affordable and fill gaps well. Spray foam earns its higher price only when you need an air barrier or you’re insulating an unvented roofline. Before you touch old insulation, especially anything loose and grainy that could be vermiculite, get it tested. Vermiculite often contains asbestos, and disturbing it without testing is a real health risk.
TL;DR:
- Blown-in cellulose is the most recommended retrofit option for older homes due to its ability to fill irregular gaps and use recycled materials, despite settling concerns.
- Proper air sealing must be completed before insulation installation, as no insulation alone can stop air leaks or ensure efficiency.
- Foam insulations, including spray and rigid foam, are more expensive and generally require professional installation, offering benefits in air and moisture barriers.
- Existing old insulation, especially if granular or suspected vermiculite, should be tested for asbestos before disturbance to prevent health risks.
- Attic insulation costs vary significantly based on material, attic condition, and removal needs; obtaining multiple estimates and professional inspection is highly advised.
Table of Contents
- Which Attic Insulation Type Fits Your Project?
- Fiberglass Batt Insulation: Pros, Cons, and Installation Tips
- Blown-In Fiberglass: Strengths and Watch-Outs for Retrofits
- Blown-In Cellulose: Why It’s Often the Default Recommendation
- Spray Foam: Open-Cell vs. Closed-Cell and When Each Makes Sense
- Rigid Foam and Radiant Barriers: Targeted Tools, Not Whole-Attic Solutions
- How Much Insulation Does Your Attic Actually Need?
- DIY vs. Professional Installation: Safety Comes First
- What Attic Insulation Actually Costs and How Long It Takes
- Field-Tested Perspective from The Clean Genius
- How The Clean Genius Handles Attic Insulation and Remediation
- Where to Read the Official Guidance
- Sources
- FAQ
Which Attic Insulation Type Fits Your Project?
Here’s the fast version, before you dig into the details of each material.
- Fiberglass batts: best for simple, unobstructed attic floors and small DIY jobs on a tight budget.
- Blown-in fiberglass: best for retrofitting attics with irregular joist spacing where batts leave gaps.
- Blown-in cellulose: best for whole-attic coverage on a budget, especially in older homes with uneven framing.
- Open-cell spray foam: best for soundproofing and moderate air sealing in unvented spaces, at a lower cost than closed-cell.
- Closed-cell spray foam: best for rim joists, tight crawl transitions, and anywhere you need both insulation and a moisture barrier.
- Rigid foam board: best for continuous exterior insulation, knee walls, and rim joists needing a thin, high-R layer.
- Radiant barrier: best as a supplement in hot, sunny climates, not a standalone solution.
Budget tiers run roughly low (fiberglass batts, blown fiberglass) to high (closed-cell spray foam), with DIY friendliness dropping as you move up that scale. None of these materials do their job well if your attic still leaks air around the ceiling plane or lacks proper soffit-to-ridge ventilation. Handle that first.
Fiberglass Batt Insulation: Pros, Cons, and Installation Tips
Fiberglass batts run about R-2.9 to R-3.8 per inch, and most attic-floor jobs use 8 to 12 inches to hit modern targets. It’s the cheapest material per square foot and the easiest to buy at any hardware store, which makes it the default choice for homeowners insulating a simple, open attic floor themselves.
The catch is installation quality. Batts compressed to fit a gap, or cut short and left with edge voids, lose R-value fast, sometimes dropping performance by a third or more in that spot. Moisture exposure also causes fiberglass to clump and sag over time, which is why attics with any history of roof leaks need an inspection first.
Pro Tip: Buy unfaced batts if you’re layering a second course over existing insulation. Faced batts trap moisture between layers instead of letting it escape.
Lay the second layer perpendicular to the joists to cover the framing members, and keep insulation pulled back from recessed lighting fixtures and flue pipes unless they’re rated for direct contact.
Blown-In Fiberglass: Strengths and Watch-Outs for Retrofits
Blown-in fiberglass conforms to odd joist spacing, wiring runs, and old ductwork in ways batts simply can’t, which makes it a strong retrofit choice for attics that were insulated decades ago with something thinner. Per inch, it runs R-2.2 to R-2.7, a bit lower than batts, so installers compensate with greater depth.
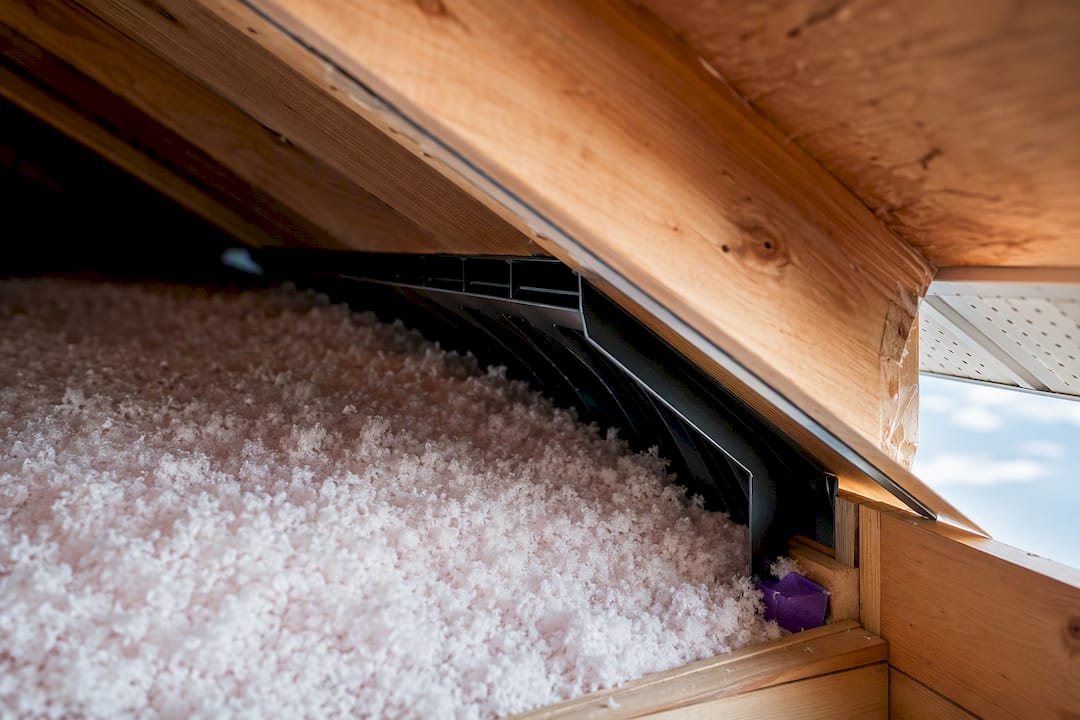
The two failure points to watch are settling and eave coverage. Blown fiberglass can thin out near the perimeter where it meets the roofline, exactly where soffit ventilation depends on clear airflow. That’s why installers use rafter baffles to keep a channel open above the insulation, a detail ENERGY STAR’s installation guidance calls out specifically.
You can rent a blower machine from most home centers for a weekend DIY job, but expect a genuinely messy few hours. Full-face respirators, sealed goggles, and taping off HVAC returns aren’t optional here. Two people make the job far more manageable, one feeding the hopper and one on the hose.
Blown-In Cellulose: Why It’s Often the Default Recommendation
Cellulose runs R-3.2 to R-3.8 per inch, competitive with fiberglass batts, and it’s made mostly from recycled newsprint treated with borate for fire and pest resistance. Its density lets it flow into gaps around wiring, plumbing stacks, and irregular framing better than batts, which is why energy auditors reach for it so often on older homes with inconsistent joist bays.
The tradeoff is settling. Loose-fill cellulose can compress over time, losing effective R-value as it packs down, sometimes 15 to 20 percent over several years if it was installed too loose to begin with. Reputable installers counter this by specifying dense-pack methods in enclosed cavities like knee walls, or by installing slightly heavier initial coverage on open attic floors to account for expected settling.
Cellulose also absorbs moisture more readily than fiberglass, so it’s a poor fit for attics with unresolved roof leaks or condensation problems. Get those issues fixed first, or you’re insulating over a problem that will only get worse.
Spray Foam: Open-Cell vs. Closed-Cell and When Each Makes Sense
The performance gap between spray foam types is bigger than most homeowners expect. Closed-cell spray foam delivers roughly R-6 per inch, nearly double fiberglass batts, and it doubles as an air barrier and moisture barrier in the same application. That combination is why it’s the go-to for rim joists, unvented roof assemblies, and any spot where air infiltration and moisture control matter as much as raw R-value.
Open-cell foam runs closer to R-3.5 per inch, softer and more vapor-permeable, and it’s generally cheaper than closed-cell while still sealing air leaks better than any loose-fill material.
Both types cost significantly more per square foot than fiberglass or cellulose, and neither is a realistic DIY project. Spray foam requires trained, often certified installers working with specialized equipment, correct mixing ratios, and proper ventilation during curing. It’s not the material to save money on by skipping a professional. Compared with spray foam vs blown-in cellulose or fiberglass, the choice mostly comes down to whether you need an air barrier built into the insulation itself or you’re simply topping off an attic floor.
Rigid Foam and Radiant Barriers: Targeted Tools, Not Whole-Attic Solutions
Rigid foam board earns its place in specific spots rather than blanketing an entire attic floor. Polyiso, XPS, and EPS boards work well for continuous exterior insulation, rim joists, and knee walls, where a thin layer of insulation with relatively high R-value per inch solves a problem loose-fill can’t reach. Polyiso typically offers the highest R-value per inch of the three, though its performance can dip slightly in very cold temperatures.
A radiant barrier is a different animal entirely. It’s a reflective layer, often foil-faced, stapled to the underside of roof rafters to reflect radiant heat rather than slow conductive heat transfer the way bulk insulation does. That makes it genuinely useful in hot, sunny climates where attic temperatures spike, but only when it’s paired with proper attic ventilation. Installed without adequate airflow, a radiant barrier can trap heat instead of deflecting it.
Neither product replaces bulk insulation on the attic floor. Think of rigid foam and radiant barriers as targeted upgrades layered alongside cellulose, fiberglass, or spray foam, not competitors to them.
How Much Insulation Does Your Attic Actually Need?
Insulation performance depends on both material and depth, and the numbers vary more than most people realize. Closed-cell spray foam hits about R-6 per inch, while blown-in fiberglass sits closer to R-2.2 to R-2.7, so “12 inches of insulation” means very different things depending on what’s up there.
By the numbers: DOE and ENERGY STAR recommend bringing uninsulated attics in climate zones 4 through 8 up to R-60, and topping off attics that already have a few inches to R-49 in many cases. Homeowners who air-seal and insulate together save an average of 15% on heating and cooling costs, about 11% on total energy bills.
Check your current depth with a tape measure at several spots across the attic floor, since insulation often settles unevenly. If you’re under 10 to 12 inches of fiberglass or cellulose, you’re almost certainly below target for most northern and midwestern climates. Layer new insulation directly over old material as long as it’s dry and unaffected by mold, and skip vapor-retarder facing on any layer that isn’t touching the ceiling drywall.
DIY vs. Professional Installation: Safety Comes First
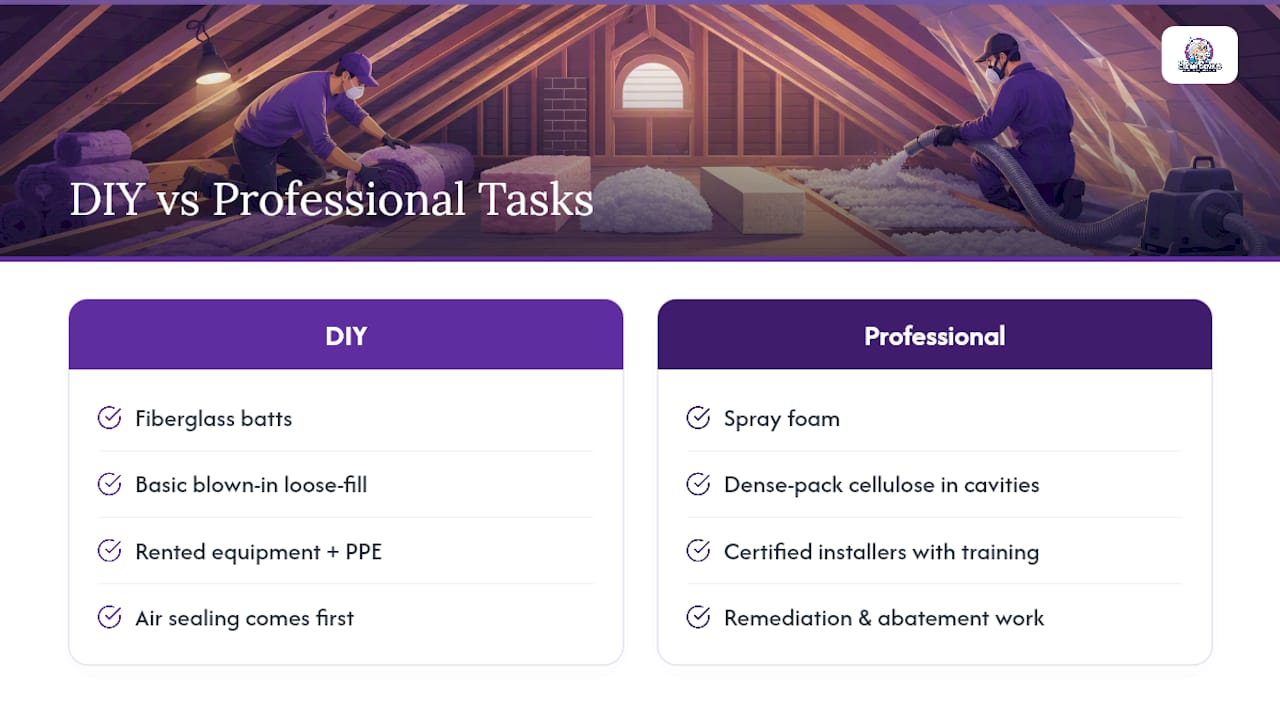
Fiberglass batts and basic blown-in loose-fill are the two jobs most DIYers can reasonably handle themselves with rented equipment and proper protective gear. Spray foam, dense-pack cellulose in enclosed cavities, and any remediation work belong with certified installers who have the training and equipment to do it safely.
Before anyone touches old insulation, test it if it looks loose, granular, and pebble-like rather than fibrous or fluffy. That texture is a hallmark of vermiculite, which frequently contains asbestos and should never be disturbed without proper testing and, if positive, professional abatement.
Pro Tip: Never bury a non-IC-rated recessed light fixture in insulation. It’s a fire hazard. ENERGY STAR’s DIY installation guide calls for a clear buffer around these fixtures and around flue pipes and chimneys.
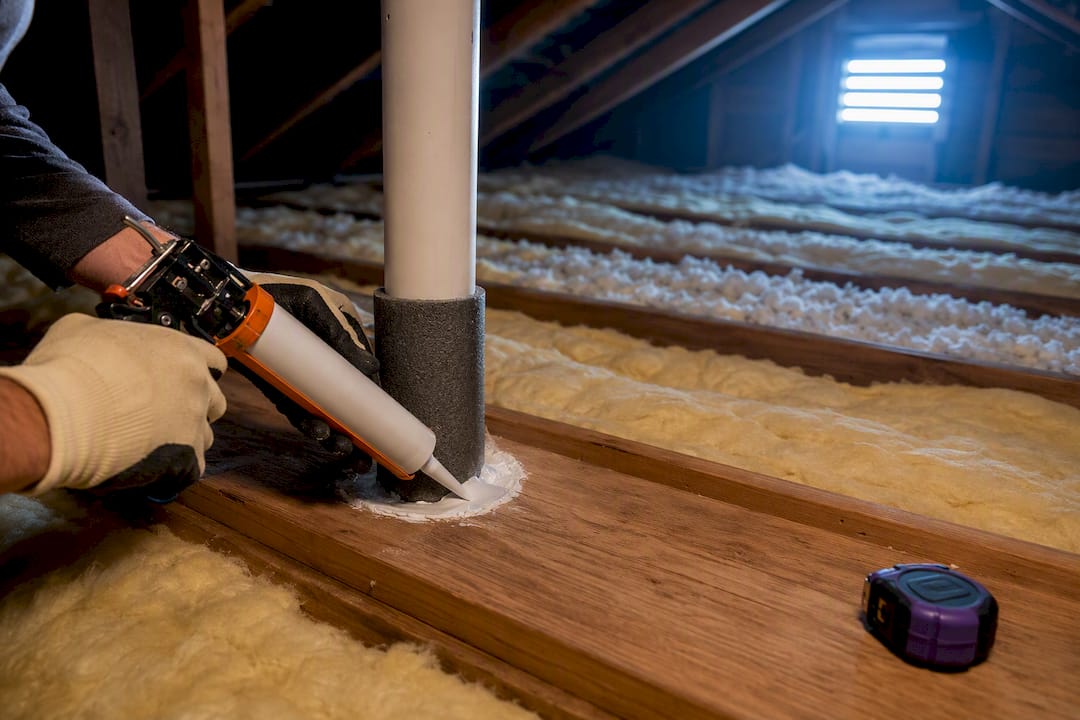
Air sealing always comes first. Insulation doesn’t stop air leakage on its own, so gaps around plumbing stacks, wiring penetrations, and the attic hatch undercut even the best insulation job. If you find water stains, rotted decking, or visible mold during inspection, call a restoration professional before adding a single bag of insulation.
What Attic Insulation Actually Costs and How Long It Takes
Price swings on a handful of factors: which material you choose, how easy your attic is to access, whether old insulation needs to come out first, how much air sealing the job requires, and local labor rates. A straightforward top-up of blown fiberglass or cellulose over existing insulation sits at the low end of the cost spectrum. Full removal and replacement, especially when it includes remediation for contaminated or moisture-damaged material, costs considerably more and takes longer.
Timeline follows the same logic. A simple top-up on an accessible attic often wraps in a single day. Full removal, air sealing, remediation, and reinsulation can stretch across two to four days depending on square footage and how much cleanup is involved.
Get at least two or three written estimates before committing, and confirm each contractor’s licensing and insurance. Ask specifically how they plan to handle soffit ventilation, since that detail gets skipped more often than it should. For a fuller breakdown of what drives pricing on a real job, see this attic insulation replacement cost guide.
Field-Tested Perspective from The Clean Genius
Chicagoland attics rarely match the tidy diagrams in an insulation brochure. Uneven old fiberglass, water staining near roof valleys, and insulation that’s been quietly compressed under decades of foot traffic show up constantly during inspections. That’s why Thecleangenius often recommends removal and remediation before any new material goes in. Adding fresh insulation over a moisture problem just hides it until the drywall or decking starts to fail.
Before calling anyone, check your attic hatch area for musty smells and shine a flashlight along the roof decking for dark staining. Both are early signs worth flagging to a professional.
— Jim
How The Clean Genius Handles Attic Insulation and Remediation
If your attic inspection turns up more than you bargained for, that’s exactly where Thecleangenius steps in. Rather than sending you off to compare five different insulation contractors, Thecleangenius handles inspection, safe removal of contaminated or wet insulation, mold remediation, and full insulation replacement as one coordinated job, working directly with your insurance carrier when damage is involved.

A typical service visit includes an on-site estimate, a moisture check with proper equipment, and a written scope of work before anything starts, so you know exactly what you’re paying for and why. If you’ve found suspect material that looks like vermiculite, or your attic has visible water staining, that’s not a job to hand off to a weekend DIY project. Homeowners across Chicagoland, from Naperville to Arlington Heights to Schaumburg, can get a straightforward read on what’s actually happening up there. Start with an attic insulation replacement estimate and find out what your attic actually needs before you buy a single roll of batts.
Where to Read the Official Guidance
The R-value targets, installation rules, and safety guidance in this article come from ENERGY STAR’s attic insulation project resources and its DIY sealing and insulating guide, along with the Department of Energy’s guidance on adding insulation to an existing home. Homeowners planning smaller efficiency upgrades alongside insulation work might also find value in resources like this guide on energy efficiency and interior doors, since air leaks rarely stop at the attic hatch.
Sources
FAQ
Why Are People Removing Spray Foam Insulation?
Homeowners sometimes remove spray foam when it was applied incorrectly, trapping moisture against roof decking and causing rot, or when off-ratio mixing left it soft, shrinking, or emitting a persistent odor. Properly installed and cured spray foam from a certified installer rarely causes these problems.
What Is the 7 and 7 Rule for Attics?
This isn’t a recognized standard from DOE or ENERGY STAR, and definitions vary by source, so focus instead on the documented R-value targets for your climate zone rather than an informal rule.
Is R-19 or R-30 Better in the Attic?
R-30 outperforms R-19 and is closer to what most modern homes need, but neither hits the R-49 to R-60 range ENERGY STAR recommends for uninsulated attics in colder climate zones. Either figure likely means your attic needs a top-up.
How Much Does It Cost to Insulate a 1,500 Sq. Ft. Attic?
Cost depends heavily on material choice, existing insulation condition, and whether removal or remediation is needed, so ranges vary widely between a simple top-up and a full tear-out and replacement. Getting a written, on-site estimate is the only reliable way to know your actual number, and Thecleangenius provides one as part of every attic insulation project.