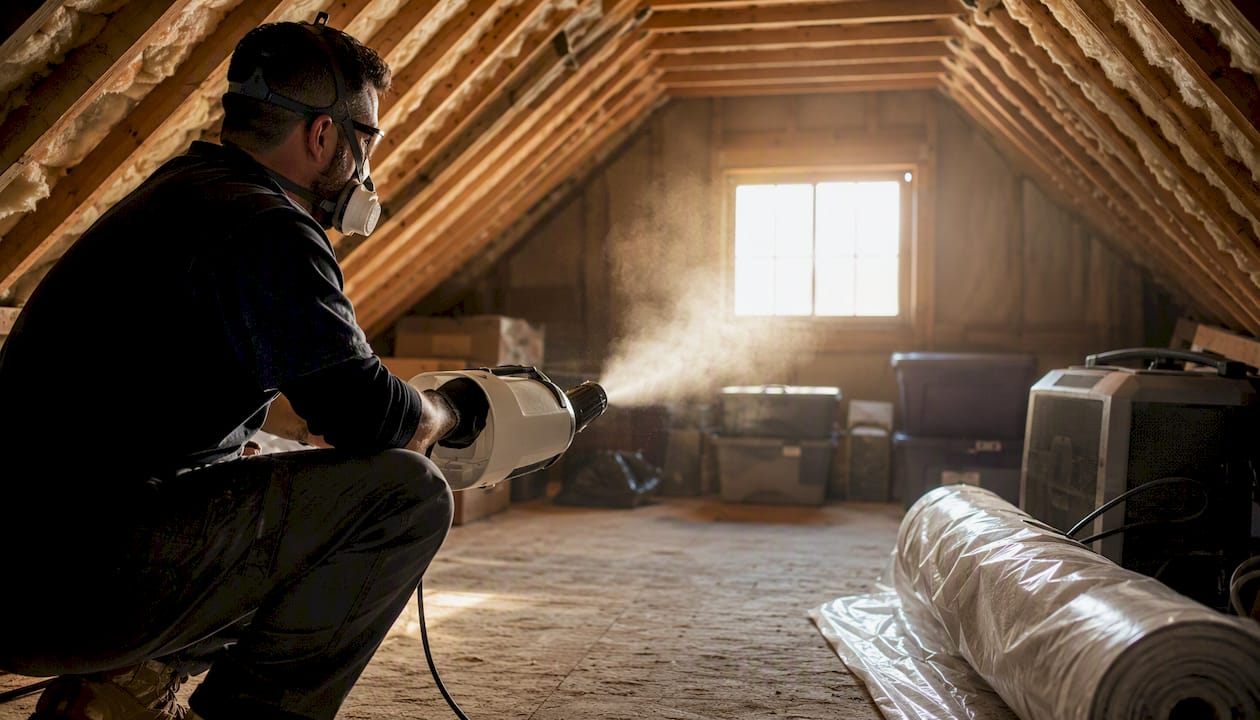

Dry fogging is a useful supplemental tool for reducing airborne and surface mold spores in specific, limited scenarios — but it is not a standalone cure for active structural mold, and using it without fixing the moisture source first almost guarantees the problem comes back. Before you rent a fogger or call a vendor promising a no-demo fix, here is what you need to do:
- Stop the moisture source first. No treatment works if water is still entering. Fix leaks, dry wet materials within 24–48 hours per EPA guidance, and confirm relative humidity is under control.
- Assess the damage honestly. Is the mold on a hard, non-porous surface, or has it grown into drywall, insulation, or wood framing? The answer changes everything.
- Remove heavily contaminated porous materials before any fogging. EPA mold cleanup guidance recommends homeowners handle areas under about 10 square feet themselves and call a professional for anything larger or hidden.
- Consider fogging as a follow-up, not a first step. IICRC S520 principles and The Clean Genius’s field experience with Pure Cloud dry-fog technology both point to the same sequence: remove, clean, then fog.
- Verify the result. A treatment without post-treatment air testing tells you nothing useful.
The CDC notes that children, elderly people, pregnant individuals, and anyone immunocompromised face higher health risks from mold exposure. If anyone in your household falls into those groups, skip the DIY route and call a certified team.
Table of Contents
- What is dry fog mold treatment, and how does it differ from other fogging methods?
- How does dry fog actually interact with mold spores?
- Does dry fogging actually work? Evidence, failure modes, and realistic outcomes
- What industry standards and regulations should you know?
- Safety planning, PPE, and how to prepare your home for dry fogging
- How to do a DIY dry-fog treatment safely (and when you should)
- Post-treatment steps: drying, cleaning, testing, and preventing recurrence
- What are the alternatives to dry fogging, and when should you use them?
- How certified teams actually use dry fog: Thecleangenius and Pure Cloud technology
- Key Takeaways
- What most homeowners get wrong about dry fogging
- Thecleangenius handles the full job, not just the fog
- Authoritative sources and further reading
What is dry fog mold treatment, and how does it differ from other fogging methods?
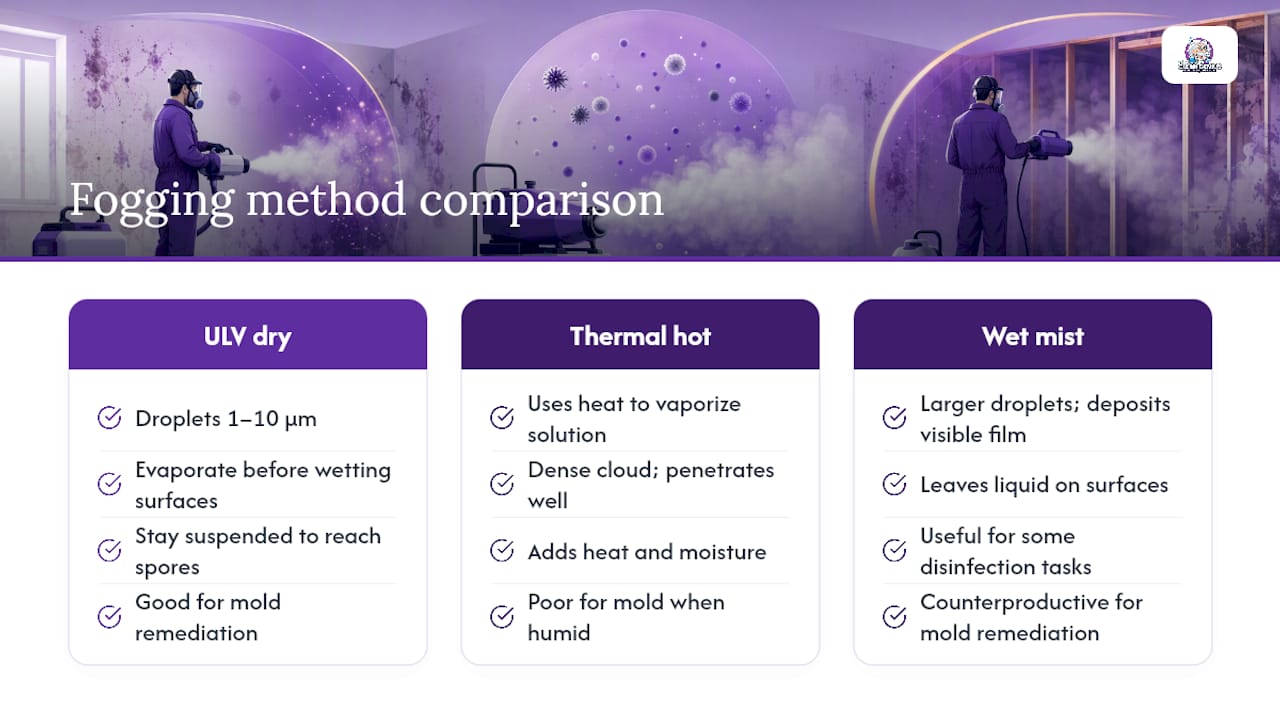
“Dry fog” is an informal marketing term for ultra-low volume (ULV) cold fogging applied at droplet sizes small enough that the particles evaporate before they wet surfaces. The industry term is ULV cold fogging, and the “dry” distinction matters: standard wet misting or thermal (hot) fogging deposits visible moisture, which can actually worsen a mold problem by adding humidity to an already damp environment.
Here is how the three main approaches compare:
ULV cold fog (dry fog): Droplets in the 1–10 micron range stay suspended in air long enough to contact airborne spores and reach small crevices, then evaporate without leaving wet residue. This is what vendors mean when they advertise “dry-fog technology.”
Thermal (hot) fog: Uses heat to vaporize a solution into a dense cloud. Penetrates well but adds heat and moisture, making it poorly suited for mold jobs where humidity is already the enemy.
Wet misting / ULV at larger droplet sizes: Deposits a visible liquid film. Useful for some disinfection tasks but counterproductive in mold remediation because it adds moisture to surfaces.
Common antimicrobial agents used in dry fogging include activated hydrogen peroxide (H2O2), peracetic acid (PAA), quaternary ammonium compounds (quats), and chlorine dioxide. The EPA registers antimicrobial products under FIFRA; always confirm the product label lists the specific use-site and organism before applying. Equipment typically includes a ULV fogger or generator, zipper-door containment barriers, and a negative air machine or HEPA air scrubber to manage airborne particles during and after treatment.
How does dry fog actually interact with mold spores?
The physics are straightforward. Droplets under 10 microns behave more like gas than liquid: they stay suspended, follow air currents into corners and crevices, and settle slowly onto surfaces. An oxidizing agent like hydrogen peroxide or peracetic acid, once it contacts a spore, disrupts the cell membrane and denatures proteins, effectively inactivating the organism.
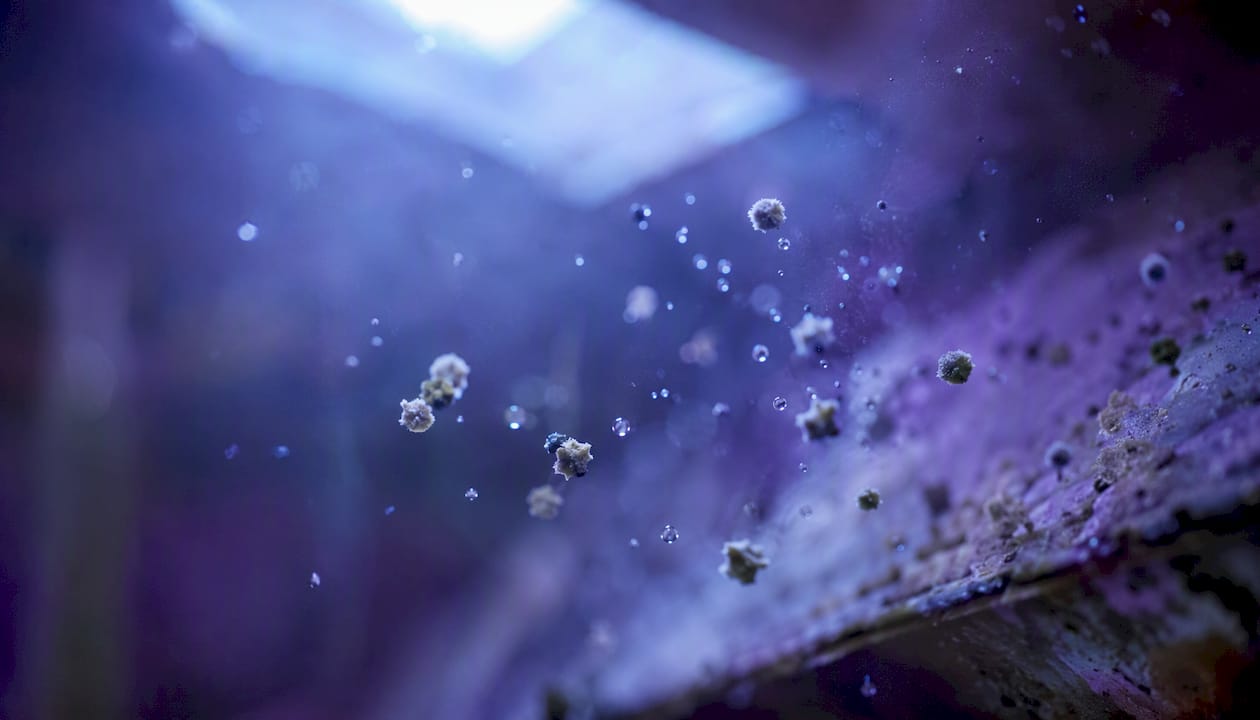
That mechanism works well on exposed, non-porous surfaces and on airborne spores. The problem is what it cannot reach. Mold does not just sit on surfaces; it sends hyphae (root-like structures) into porous materials like drywall paper, wood framing, and insulation. A fog droplet that lands on the surface of a contaminated stud does not penetrate the wood grain where the hyphae are anchored. Killing the surface layer while leaving embedded growth intact is like mowing over a dandelion: it looks better for a week.
Two additional concerns are worth knowing before you fog anything. First, some antimicrobial agents leave chemical residues that can cause respiratory irritation, especially in poorly ventilated spaces. Second, certain fogging agents, particularly chlorine dioxide at higher concentrations, can off-gas volatile organic compounds (VOCs) that create their own indoor air quality problem. Always read the Safety Data Sheet (SDS) for any product before use, and match the agent to the specific mold species and surface type when possible. Vendor claims about two-compound approaches combining an oxidizer with a surface protectant are worth evaluating, but treat lab-reported spore-reduction percentages from vendor literature with appropriate skepticism until backed by independent testing.
Does dry fogging actually work? Evidence, failure modes, and realistic outcomes
The honest answer is: it depends on what you are asking it to do.
Fogging reliably reduces airborne spore counts and can reduce surface contamination on hard, non-porous materials. What it does not do is remediate embedded mold growth in porous building materials. The IICRC R520 Reference Guide is explicit that source removal is the fundamental principle of remediation. Fogging is a supplemental step, not a replacement for removing contaminated material.
Practitioners in the field confirm this. A Florida mold assessor’s field report describes fogging as helpful in attics and crawlspaces or as a post-remediation polish after demolition, but not reliable as a standalone treatment for embedded growth. Independent equipment guides echo the same point: fogging without prior source removal leads to recurrence.
Common failure modes:
| Failure Mode | Why It Happens | Result |
|---|---|---|
| Fogging before removing wet/contaminated materials | Fog contacts surface but hyphae remain in substrate | Regrowth within weeks |
| Moisture source not fixed | Humidity sustains mold after treatment | Spore counts rebound |
| No HEPA follow-up | Disturbed spores resettle on surfaces | Contamination redistributes |
| Using consumer odor foggers | Not EPA-registered for mold; wrong droplet size | No meaningful spore reduction |
| Skipping post-treatment testing | No way to confirm effectiveness | Unknown outcome |
Realistic outcomes you can expect from a properly executed dry-fog treatment:
- A temporary drop in airborne spore counts in the treated space
- Surface spore reduction on accessible, non-porous materials (concrete, metal, painted wood)
- Odor reduction from mold-associated VOCs
- No lasting improvement if moisture and damaged porous materials remain
The IICRC S520 excerpts on fogging and misting also caution specifically about HVAC interactions: fogging into an active HVAC system can distribute antimicrobial agents and spores throughout a building, potentially worsening cross-contamination.
What industry standards and regulations should you know?
Three bodies set the authoritative framework for mold remediation in the United States: the IICRC, the EPA, and ANSI (which accredits the IICRC standards).
IICRC S520 and R520 are the professional standards most certified remediators follow. S520 defines remediation procedures and containment requirements. R520 is the companion reference guide that clarifies methods and professional judgment calls. Both documents treat source removal as the non-negotiable foundation of any remediation job. Fogging appears in these standards as a deviation or supplemental measure, not a primary method.
EPA guidance provides the practical framework most homeowners encounter first. The EPA’s mold remediation guide for schools and commercial buildings sets the 24–48 hour drying window as the threshold for preventing mold establishment after water damage, and its remediation tables specify which materials can be cleaned versus which must be removed. The EPA’s consumer cleanup page draws the DIY limit at roughly 10 square feet.
These standards matter practically in three situations: when you are hiring a contractor (ask for IICRC certification), when a health-risk scenario exists (immunocompromised occupants, visible growth in HVAC), and when post-remediation verification is required for insurance, real estate transactions, or peace of mind. A certified contractor following S520 will document the scope, apply containment, and provide clearance testing. One who skips those steps is not following the standard regardless of what their marketing says.
Safety planning, PPE, and how to prepare your home for dry fogging
Dry-fog antimicrobials are not benign household products. Hydrogen peroxide at fogging concentrations and peracetic acid are oxidizers that irritate eyes, skin, and the respiratory tract. Chlorine dioxide is a regulated biocide. Treat the preparation phase as seriously as the application itself.
Pre-treatment checklist:
- Identify all household members with asthma, allergies, or immune conditions. CDC guidance flags these groups as higher-risk; they should leave the property before treatment and not return until full ventilation is confirmed.
- Remove or cover food, dishes, and food-prep surfaces.
- Evacuate pets and remove houseplants (oxidizing agents harm plant tissue).
- Shut down the HVAC system and seal return vents to prevent chemical distribution through ductwork.
- Cover electronics and sensitive materials if the agent may leave residue.
PPE and engineering controls:
| Item | Minimum Spec | Notes |
|---|---|---|
| Respirator | N95 or P100 respirator | Full-face respirator preferred for oxidizing agents |
| Gloves | Nitrile, chemical-resistant | Replace if torn; do not reuse |
| Eye protection | Chemical splash goggles | Safety glasses alone are insufficient |
| Protective suit | Tyvek or equivalent | Prevents skin contact with concentrated agents |
| Air scrubber | HEPA-rated | Run during and after fogging |
| Negative air machine | HEPA-rated | Maintains negative pressure in containment zone |
Reentry timing: Follow the product SDS exactly. Most fogging agents require a minimum ventilation period before reentry, often a few hours with active air exchange, but sensitive occupants should wait longer. Do not rely on smell alone to judge safety; some agents are odorless at concentrations that still irritate airways. For detailed mold removal safety practices, including containment setup and disposal, review the full safety checklist before you start.
How to do a DIY dry-fog treatment safely (and when you should)
DIY dry fogging is appropriate in a narrow set of circumstances. Before you buy or rent equipment, run through this decision checklist:
- Is the affected area less than about 10 square feet of visible mold? (EPA’s DIY threshold)
- Is the moisture source fully identified and fixed?
- Are the affected materials non-porous or salvageable hard surfaces?
- Is the space accessible and containable?
- Does anyone in the household fall into a vulnerable health category?
If you answered “no” to any of the first four or “yes” to the last one, stop here and read the professional vs. DIY mold removal guide before proceeding.
Supplies you need:
- ULV fogger rated for 1–10 micron droplet output
- EPA-registered antimicrobial agent labeled for mold and your specific surface type (verify the SDS)
- Containment materials: 6-mil poly sheeting, zipper doors, painter’s tape
- HEPA air scrubber (rental available at most equipment suppliers)
- HEPA vacuum with attachments
- Moisture meter
- Full PPE as listed in the previous section
Step-by-step procedure:
- Inspect and map moisture. Use a moisture meter to confirm all wet areas are identified. Do not fog until readings are in the normal range for the material type.
- Remove unsalvageable porous materials. Drywall, insulation, and carpet with visible mold growth come out first, sealed in 6-mil poly bags before leaving the containment zone.
- Contain and seal the area. Hang poly sheeting at doorways, seal HVAC vents, and set up the HEPA air scrubber in negative-air mode (exhausting to outside when possible).
- Pre-clean with HEPA vacuum. Vacuum all accessible surfaces before fogging. This removes loose spores that the fog would otherwise just redistribute.
- Mix and load the fogging agent per label instructions. Do not exceed the recommended concentration; higher is not more effective and increases residue and irritation risk.
- Apply the fog. Work from the far end of the space toward the exit. Follow the manufacturer’s application rate (typically measured in square footage per fluid ounce). Allow the specified dwell time before ventilating.
- Ventilate. Open windows, run the air scrubber, and allow the space to air out for the time specified on the SDS.
- HEPA detail-clean. After ventilation, vacuum all surfaces again and damp-wipe hard surfaces with a clean microfiber cloth.
- Verify. Take post-treatment moisture readings and, ideally, arrange independent air testing before declaring the job done.
Common mistakes to avoid:
- Fogging before removing wet or visibly contaminated materials
- Using consumer “odor eliminator” foggers, which are not EPA-registered for mold and use the wrong droplet size
- Fogging into an active HVAC system
- Skipping the pre-fog HEPA vacuum (you are just redistributing spores)
- Trusting any vendor who refuses to provide independent post-treatment testing
Pro Tip: Request the SDS for any fogging agent before you buy it. If a vendor cannot or will not provide it, that product is not worth using.
Post-treatment steps: drying, cleaning, testing, and preventing recurrence
The fog application is not the end of the job. What happens in the 24–72 hours after treatment largely determines whether the result holds.
Immediate aftercare:
- Keep the HEPA air scrubber running for at least several hours after ventilation begins.
- HEPA-vacuum all surfaces a second time once the space is safe to reenter.
- Damp-wipe hard surfaces with a clean cloth; dispose of the cloth in a sealed bag.
- Bag and remove all waste materials from the containment zone before breaking down the poly sheeting.
Moisture control for the long term: Keeping relative humidity below 60% is the single most effective mold-prevention measure you can take. Fix any remaining leaks, improve bathroom and kitchen exhaust ventilation, and check attic insulation and vapor barriers. Attic moisture problems are a common driver of recurring mold in Chicagoland homes, particularly after harsh winters. For a full prevention plan after treatment, the post-mold treatment prevention guide covers the practical steps in detail.
Verification options:
- Live-spore airborne testing is the most meaningful post-treatment check. Standard spore-trap counts include dead spores and do not confirm that viable mold has been eliminated. Independent guides stress live-spore testing specifically for this reason.
- Moisture meter readings confirm the substrate is dry enough to prevent regrowth.
- Licensed industrial hygienist clearance is worth the cost when health risk is elevated, when the job involved significant demolition, or when the result will be used for insurance or real estate purposes.
If spore counts remain elevated after treatment, the likely cause is either an untreated moisture source or embedded mold in materials that were not removed. Fogging again without addressing those root causes will not change the outcome.
What are the alternatives to dry fogging, and when should you use them?
Dry fogging does not exist in isolation. Depending on the scope and location of the mold problem, one of these approaches may be more appropriate, or a combination may be the right call.
Physical removal and reconstruction is the gold standard for structural mold. When mold has grown into drywall, wood framing, or insulation, removing the material is the only reliable fix. Fogging afterward as a post-remediation polish is appropriate; fogging instead of removal is not.
HEPA vacuuming and encapsulation works well for mold on hard, non-porous surfaces like concrete block or painted masonry where removal is impractical. HEPA vacuuming removes loose spores; an encapsulant seals the surface. This approach is common in basements and crawlspaces.
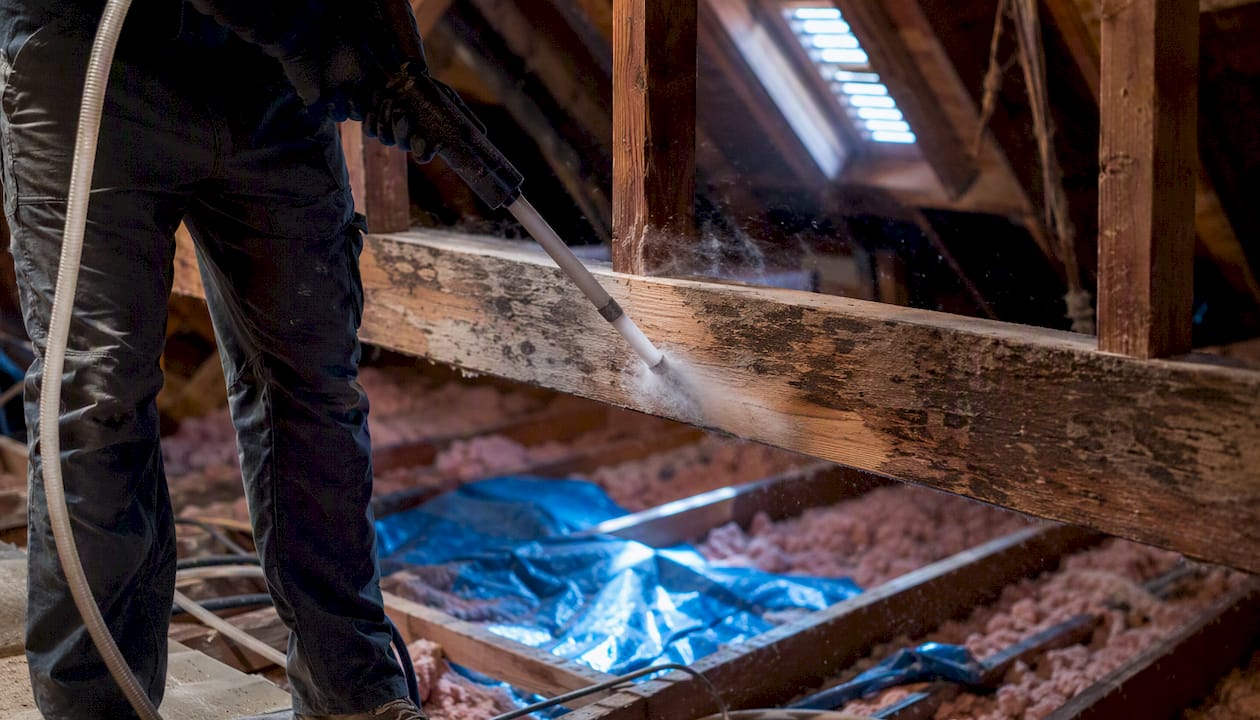
Dry-ice blasting is a specialty method used on exposed wood framing, particularly in attics. It removes surface mold mechanically without adding moisture, which makes it well-suited for attic remediation where wet methods would raise humidity. It requires professional equipment and is not a DIY option.
HVAC cleaning is a separate but related job. If mold has colonized ductwork or the air handler, fogging the living space without addressing the HVAC system means the system will redistribute spores every time it runs. HVAC mold remediation follows its own protocol and typically requires a specialist.
Where dry fogging fits best:
- Attic framing after physical removal of loose debris, as a post-remediation polish
- Crawlspaces with surface mold on non-porous or semi-porous materials
- Post-remediation treatment of a room after demolition and HEPA cleaning
- Odor control in spaces where mold-associated VOCs persist after cleanup
Where dry fogging is the wrong tool:
- Active water intrusion or wet materials still in place
- Mold embedded in drywall, insulation, or carpet
- Occupied living spaces with vulnerable occupants present
- Any situation where the moisture source has not been identified and fixed
For attic-specific mold scenarios, the attic mold prevention guide covers the full sequence from inspection through prevention.
How certified teams actually use dry fog: Thecleangenius and Pure Cloud technology
The difference between a professional dry-fog job and a DIY attempt is not just the equipment. It is the sequence, the documentation, and the verification.
When Thecleangenius responds to a mold job, the process follows a documented workflow before a fogger is ever turned on:
- Tear-out when necessary: Contaminated porous materials come out first. The certified remediation process for Chicagoland homes follows IICRC S520 principles, which means source removal is not optional when porous materials are affected.
Homeowners working with Thecleangenius also get direct insurance coordination, which matters when mold damage follows a water event. The team handles water damage restoration and mold remediation as a connected service, so the moisture problem and the mold problem are addressed together rather than in separate, disconnected visits.
Pro Tip: Ask any mold remediation contractor for their post-remediation verification protocol before signing anything. If they do not offer independent air testing as part of the job, that is a gap worth addressing in writing.
Key Takeaways
Dry fogging works as a supplemental mold treatment when moisture is controlled and damaged porous materials are removed first; used alone, it produces temporary results at best.
| Point | Details |
|---|---|
| Fix moisture first | No fogging treatment holds if the moisture source remains active; confirm readings below 60% RH before any application — see this mice prevention checklist for homeowners for related home maintenance steps. |
| Remove porous materials first | Mold embedded in drywall, insulation, or wood cannot be reached by fog; physical removal must come before fogging. |
| Verify with live-spore testing | Standard spore-trap counts include dead spores; live-spore airborne testing is the only reliable confirmation that viable mold is gone. |
| Know the DIY limit | EPA guidance sets the homeowner DIY threshold at about 10 square feet of visible mold; anything larger or hidden warrants a certified professional. |
| Thecleangenius uses Pure Cloud | Thecleangenius applies Pure Cloud dry-fog technology as part of a full IICRC-aligned workflow including moisture mapping, tear-out, HEPA cleaning, and third-party verification across Chicagoland. |
What most homeowners get wrong about dry fogging
The gap between what dry fogging is marketed as and what it actually does is where most homeowners lose money and time. Vendors selling fog-only remediation packages lean hard on the appeal of a no-demo fix: no dust, no reconstruction, no disruption. That pitch works because demolition is genuinely disruptive and expensive. But the pitch is built on a misunderstanding of what fog can physically do.
Fog reaches surfaces. It does not reach inside them. A mold colony growing in the paper facing of drywall or in the grain of a floor joist is not exposed to the fog in any meaningful way. The surface layer may be treated; the colony underneath is not. Three weeks later, the spore counts are back, and the homeowner is left wondering why the expensive fog treatment did not hold.
The other thing homeowners consistently underestimate is the importance of verification. Most people who fog a space declare success based on smell. Mold-associated odors do drop after fogging, because the surface VOCs are oxidized. But odor reduction is not the same as mold elimination. The only way to know whether viable spores are gone is to test for them specifically, with a method that distinguishes live organisms from dead ones.
What actually works is the sequence the IICRC has described for decades: find the moisture, fix the moisture, remove what cannot be saved, clean what can be saved, and then use fogging as a finishing step on a space that has already been properly remediated. Dry fogging in that context is genuinely useful. Outside that context, it is an expensive air freshener.
Thecleangenius handles the full job, not just the fog
When mold shows up in a Chicagoland home, the fog is rarely the hard part. Finding where the moisture came from, deciding what has to come out, containing the work area so spores do not spread to the rest of the house, and then verifying the result with real testing: that is the job. Thecleangenius does all of it.

The certified team at Thecleangenius uses Pure Cloud dry-fog technology as one step in a documented, IICRC-aligned remediation workflow, not as a shortcut around the harder work. For homeowners dealing with mold after a flood, a burst pipe, or a slow roof leak, the mold removal and remediation service covers inspection, containment, tear-out when needed, Pure Cloud fogging, and third-party air testing. Insurance coordination is included. The team is available 24/7 across the greater Chicagoland area, from Naperville and Schaumburg to Crystal Lake and Wheaton.
If the scope is beyond what a DIY treatment can safely handle, or if anyone in the household is in a vulnerable health category, call Thecleangenius for an on-site assessment before the problem grows.
Authoritative sources and further reading
These are the primary references used throughout this guide. Each one is worth bookmarking if you are managing a mold situation or hiring a contractor.
- Mold Remediation in Schools and Commercial Buildings Guide (EPA moldremediation.pdf)
- Mold cleanup your home (EPA)
- CDC — Mold and health
- Reference Guide for Professional Mold Remediation (IICRC R520 preview)
- IICRC S520 excerpts (Fogging/Misting/HVAC)
- Does Mold Fogging Work? A Florida Mold Assessor Explains (CleanAirMiami)
- Does Dry Fogging Work for Mold Removal? The Real Truth (getfogmachine.com)
- How does dry-fog mold remediation work? (MoldGone)
- What Is Dry Fog Mold Remediation? How it works + what’s in it (ClaroPure)
- The Clean Genius (company landing page)