Mold removal safety best practices are defined as the combination of moisture control, personal protective equipment, and physical removal techniques that protect your health and prevent mold from returning. The EPA, Minnesota Department of Health (MN DOH), and North Carolina Department of Labor (NC DOL) all agree: you cannot simply kill mold with a spray and call it done. The real work starts with stopping the water source, suiting up correctly, and following a clear sequence of steps. Get that sequence wrong and you risk spreading spores to clean areas, triggering respiratory symptoms, or watching the same patch of mold reappear within weeks.
1. Mold removal safety best practices start with moisture control
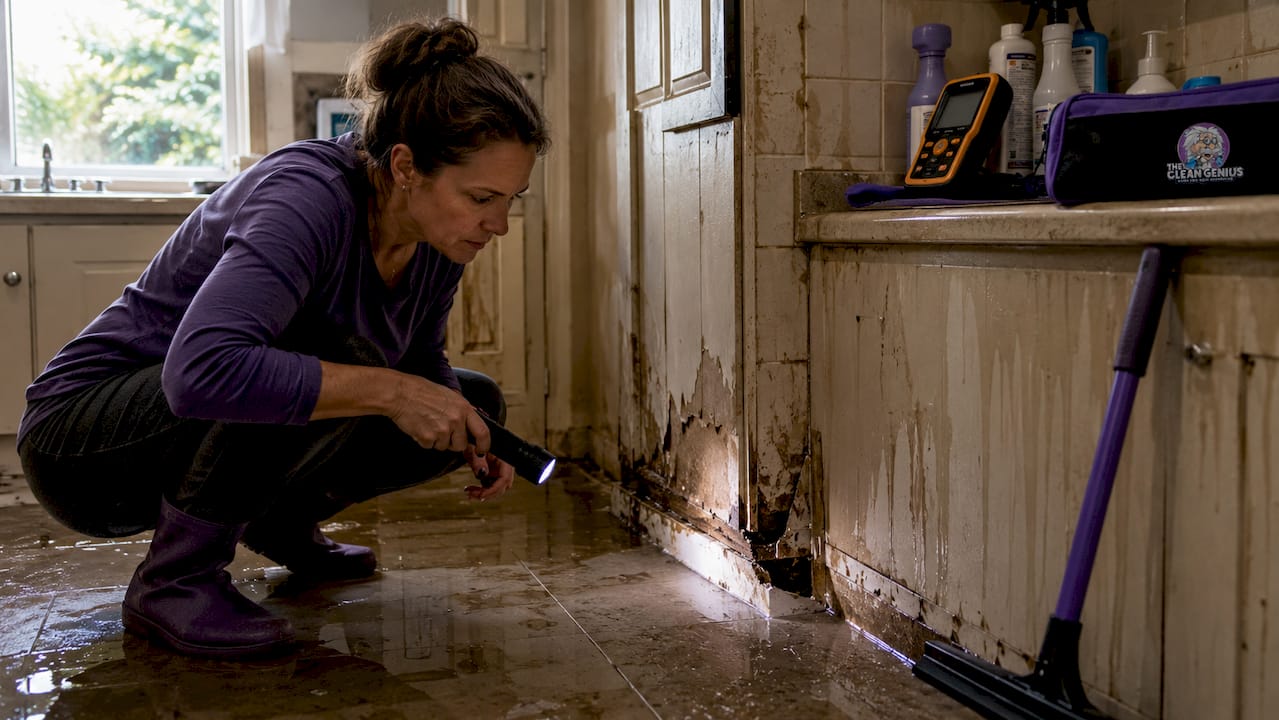
Fixing the moisture source is not a preliminary step. It is the entire foundation of safe mold remediation. Mold will recur even after thorough cleaning if the underlying water problem remains unresolved. A leaking pipe, condensation on cold walls, or a poorly ventilated bathroom creates the exact conditions mold needs to recolonize within days.
The target indoor humidity is 30 to 50 percent, with 60 percent as the absolute ceiling. Use a digital hygrometer (available at most hardware stores for under $15) to monitor levels. Dehumidifiers, exhaust fans in bathrooms and kitchens, and properly graded exterior drainage all reduce moisture load. Check gutters twice a year and seal air leaks around windows and basement walls to cut condensation at the source.
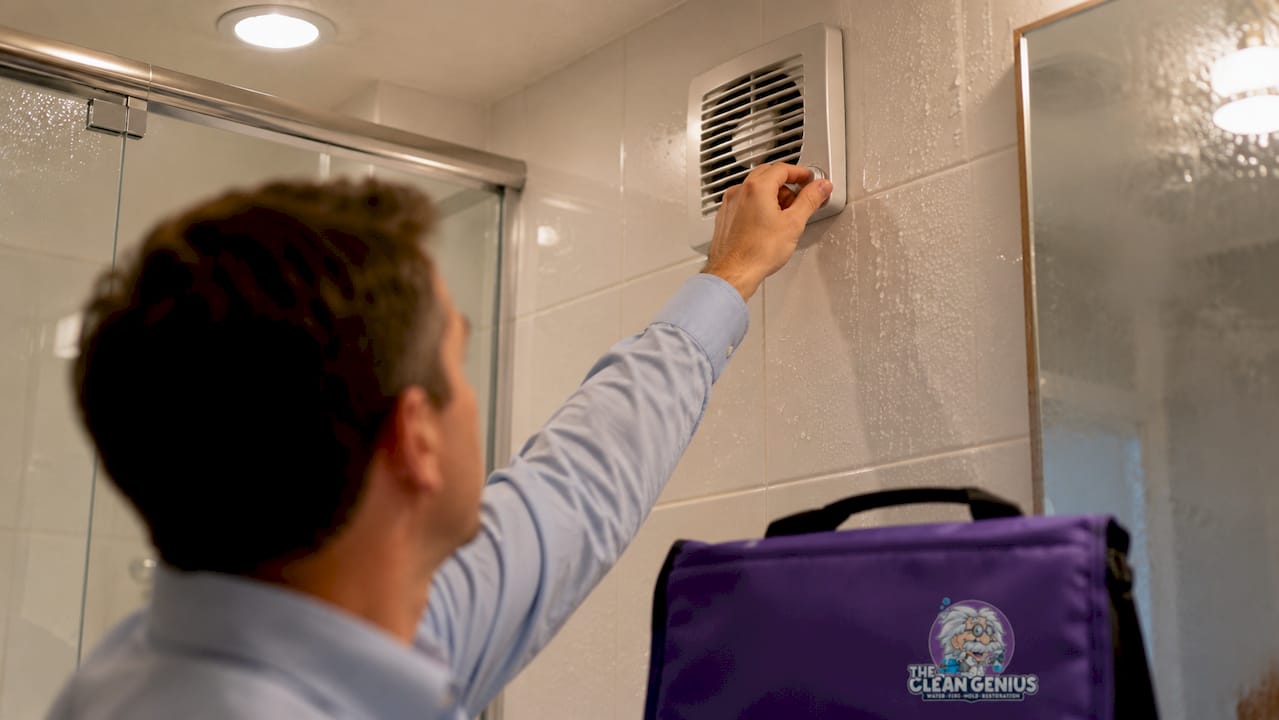
Pro Tip: Run your bathroom exhaust fan for at least 20 minutes after every shower. Most homeowners turn it off when they leave the room, which leaves residual moisture trapped long enough to feed mold growth behind tiles and on drywall.
2. Dry wet areas within 24 to 48 hours
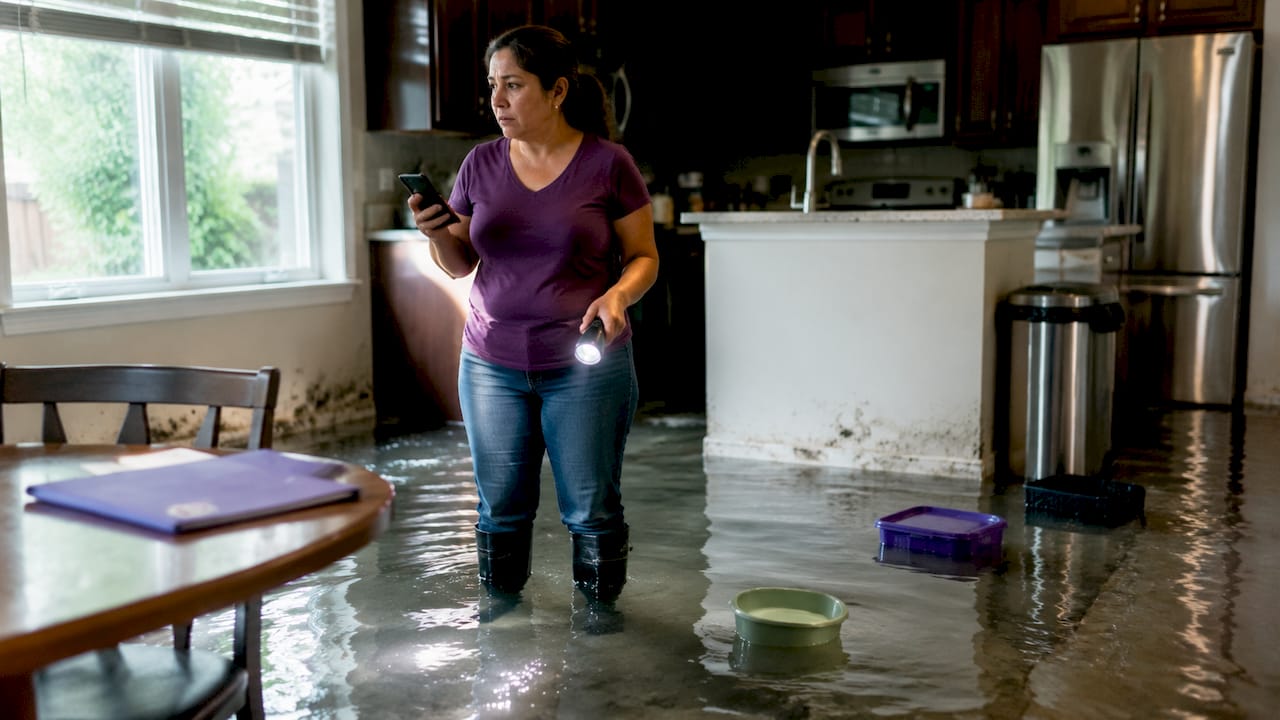
Speed is the single most underrated factor in mold prevention. Wet materials dried within 24 to 48 hours will not develop mold growth in most cases. Wait longer than that and you are no longer preventing mold. You are managing it.
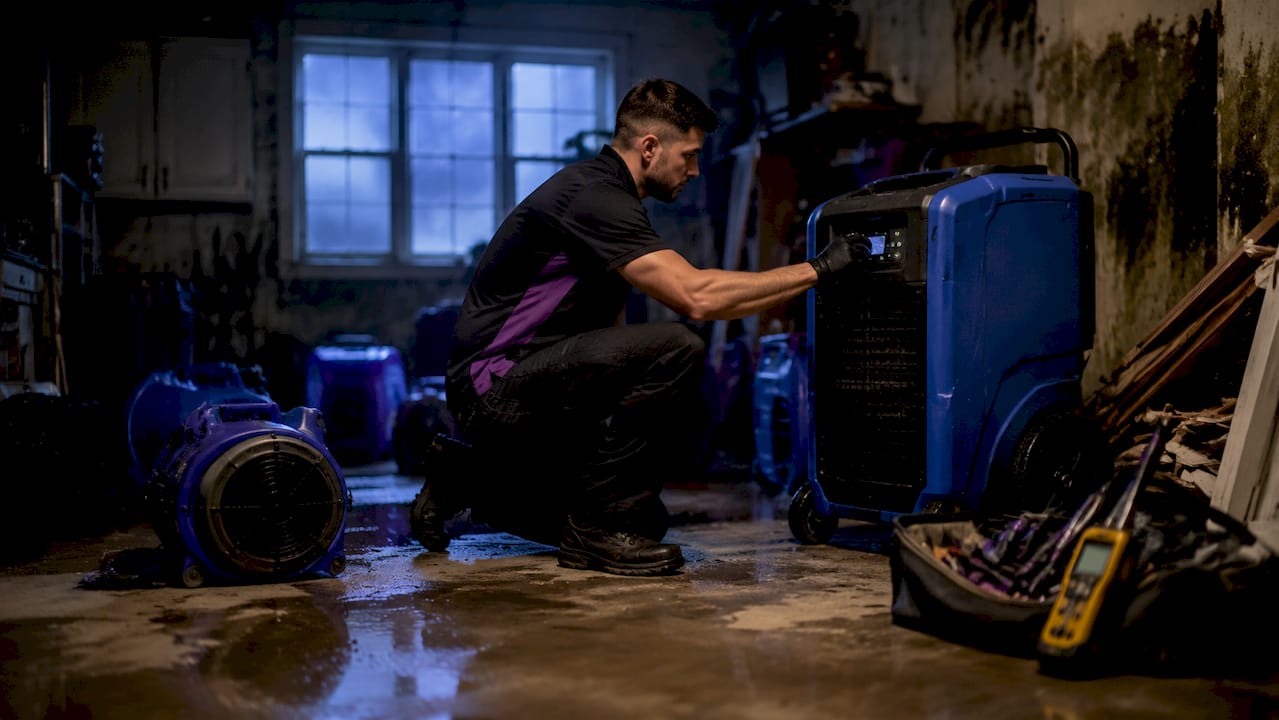
After any water intrusion, whether from a burst pipe, a roof leak, or a basement flood, pull up wet rugs, move wet furniture away from walls, and run fans immediately. Open windows if outdoor humidity is lower than indoor levels. A shop-style wet/dry vacuum removes standing water faster than towels or mops. For larger events, water damage restoration professionals use industrial drying equipment that cuts drying time significantly compared to consumer fans.
Porous materials that have been wet for more than 48 hours should be treated as contaminated and removed. Drywall, carpet padding, and ceiling tiles absorb moisture deeply and cannot be reliably dried once mold has begun colonizing the interior fibers.
3. Select the right personal protective equipment
PPE is not optional during mold cleanup. PPE use limits exposure to mold spores that affect eyes, skin, mouth, and lungs. The minimum gear for any mold cleanup job includes long rubber or nitrile gloves, non-vented goggles, and an N-95 respirator.
- Gloves: Use rubber gloves that extend to the mid-forearm when working with detergent and water. If you are using a bleach solution, upgrade to thicker neoprene or PVC gloves since thin nitrile can degrade with repeated bleach contact.
- Goggles: Non-vented goggles prevent airborne spores from reaching your eyes. Standard safety glasses with open sides do not provide adequate protection.
- Respirator: N-95 respirators cost $12 to $25 and filter out at least 95 percent of airborne particles. Fit is critical. A loose seal around the nose and chin renders the mask nearly useless, which is why OSHA requires fit testing for occupational use.
Pro Tip: After finishing cleanup, remove your work clothes before entering the rest of your home and wash them immediately in hot water. Mold spores cling to fabric and can transfer to clean areas of your house if you carry contaminated clothing through hallways or living spaces.
4. Contain the work area before you start
Containment is what separates a controlled cleanup from a contamination event. Sealing off the work area with plastic sheeting and duct tape prevents spores from migrating to adjacent rooms during scrubbing and material removal. Cover HVAC vents in the work area to stop spores from entering the duct system and spreading throughout the house.
Set up a negative pressure environment if possible by placing a box fan in a window exhausting air outside. This pulls air out of the room rather than pushing contaminated air into the rest of the home. For a detailed breakdown of why this step matters so much, the guide on mold remediation containment explains the mechanics clearly.
Close doors to the work area and use a second layer of plastic sheeting as an entry flap so you can move in and out without breaking the seal. This setup takes 20 minutes to build and can prevent weeks of secondary cleanup.
5. Clean hard surfaces with detergent and water first
The EPA’s basic mold cleanup approach is straightforward: scrub hard surfaces with detergent and water, then dry them completely. Tile, glass, metal, sealed wood, and concrete all qualify as hard surfaces where physical scrubbing removes mold effectively.
Use a stiff-bristled brush and a solution of dish soap or a dedicated mold-cleaning detergent. Scrub in a circular motion to break up the mold colony rather than smearing it across the surface. Rinse with clean water and dry immediately with a clean cloth or fan. The sequence matters: moisture control first, then cleaning, then drying. Skipping or reversing any step reduces effectiveness.
One mistake that shows up constantly in DIY attempts is painting or caulking over mold before cleaning. Paint applied over mold will peel because the mold continues to grow underneath, breaking the bond between paint and surface. Clean and dry the surface completely before any finishing work.
6. Use bleach only as a secondary disinfectant
Bleach is optional, not mandatory, in residential mold cleanup. Bleach can be applied after physical removal as a disinfectant step on hard, non-porous surfaces. It does not penetrate porous materials and will not kill mold growing inside drywall or wood grain.
The correct dilution is 1/4 to 1/2 cup of household bleach per gallon of water. Apply with a sponge or spray bottle, let it sit for 10 minutes, then rinse and dry. Ventilate the area thoroughly during and after application. Never mix bleach with ammonia-based cleaners. That combination produces chloramine gas, which causes serious respiratory damage.
| Cleaning agent | Best surface type | Safety requirement |
|---|---|---|
| Detergent and water | All hard surfaces | Gloves, goggles |
| Bleach solution (diluted) | Non-porous hard surfaces only | Gloves, goggles, ventilation |
| Commercial mold cleaner | Varies by product | Follow label instructions |
Pro Tip: Bleach loses potency quickly once diluted. Mix a fresh solution each time you clean. A bottle of diluted bleach sitting in a spray bottle for a week has significantly reduced disinfecting power.
7. Remove and discard porous materials correctly
Porous materials like carpet, carpet padding, drywall, ceiling tiles, and insulation cannot be reliably cleaned once mold has colonized them. Mold penetrates deep into the material structure where scrubbing cannot reach. Removal is the only safe option.
- Double-bag all moldy porous materials in heavy-duty plastic bags (at least 6 mil thickness).
- Seal each bag with duct tape before carrying it through the home.
- Mist the material lightly with water before bagging to reduce airborne spores during handling.
- Transport bags directly outside without passing through clean living areas.
- Check your local municipality’s guidelines for disposal. Most areas treat moldy materials as regular construction debris, but some jurisdictions have specific rules for large remediation projects.
NC DOL guidelines specify that contaminated materials should be sealed in plastic bags before removal from the work area. This step is non-negotiable for keeping the rest of your home clean during cleanup.
8. Ventilate the work area throughout cleanup
Ventilation serves two purposes during mold removal: it reduces your exposure to airborne spores and it helps dry surfaces faster after cleaning. Open a window in the work area and position a fan to exhaust air outside, not into adjacent rooms. This creates a one-directional airflow that carries spores out of the space.
Do not run your central HVAC system while cleaning. Forced air through ducts can pick up spores from the work area and deposit them in every room the system serves. Turn the system off and cover vents with plastic sheeting taped at the edges. Once cleanup is complete and surfaces are dry, run the system with a fresh MERV-13 or higher filter installed to capture any residual particles.
9. Recognize when the problem is beyond DIY
DIY mold cleanup is appropriate for small, isolated patches on hard surfaces in well-ventilated areas. The situation changes when mold covers more than 10 square feet, appears in HVAC systems, follows water damage that soaked structural materials, or causes persistent health symptoms like coughing, sneezing, or eye irritation in occupants.
Hidden mold behind walls, under flooring, or in attic spaces requires professional assessment. Certified mold remediation professionals use air sampling, moisture meters, and thermal imaging to locate mold that is not visible to the naked eye. Attempting to remove hidden mold without proper containment and equipment often makes the problem worse by disturbing colonies and spreading spores before they can be captured. If you are unsure whether your situation qualifies as a DIY job, the guide on when to call the pros provides clear thresholds.
10. Verify the cleanup worked and prevent recurrence
Cleanup is not finished when the visible mold is gone. Verify success by checking that all surfaces are dry, there is no musty odor, and humidity levels have returned to the 30 to 50 percent range. A musty smell without visible mold is a reliable indicator that mold is still present somewhere in the space.
Long-term prevention comes down to the same principle that started this list: moisture control. Fix plumbing leaks within 24 hours. Clean and inspect gutters each fall. Use exhaust fans consistently. Check under sinks and around water heaters every few months. For homes in Chicagoland where basement moisture and attic condensation are common seasonal problems, the attic mold prevention guide covers the specific conditions that drive recurring growth in this region.
Key takeaways
Safe mold removal requires fixing the moisture source first, using proper PPE throughout, and following the sequence of containment, physical cleaning, and correct disposal before any disinfectant step.
| Point | Details |
|---|---|
| Moisture control is the foundation | Fix leaks and dry wet areas within 24 to 48 hours to stop mold before it starts. |
| PPE protects every exposure point | Wear N-95 respirators, non-vented goggles, and appropriate gloves for every cleanup session. |
| Porous materials must be discarded | Carpet, drywall, and insulation cannot be cleaned once mold colonizes them. Remove and bag them. |
| Bleach comes last, not first | Apply diluted bleach only after physical removal on hard surfaces, never as a substitute for scrubbing. |
| Know your DIY limits | Mold covering more than 10 square feet or hidden in walls requires certified professional remediation. |
What 25 years of mold jobs taught me about homeowner mistakes
The most common mistake I see is not the one you would expect. It is not skipping the respirator or using the wrong cleaner. It is treating mold as a cosmetic problem instead of a moisture problem. Homeowners scrub the surface, maybe spray some bleach, and consider it done. Three months later the mold is back in the exact same spot because the slow leak behind the wall or the condensation on the cold pipe was never addressed.
The second thing I have learned is that people underestimate how far spores travel when you disturb a colony without containment. I have seen a bathroom mold problem turn into a whole-house air quality issue because someone ran a dry wire brush over the tile with the HVAC running and no plastic on the vents. The cleanup cost ten times more than it would have with basic containment in place.
My honest advice: do the PPE, do the containment, and do not skip the drying step. Most DIY mold jobs fail not because the person used the wrong product but because they rushed the drying phase and left residual moisture in the wall cavity or under the baseboard. Mold does not need much. A slightly damp surface in a dark corner is enough.
And if you find yourself looking at a patch that keeps coming back, or you notice mold in more than one room, stop the DIY work and call a certified remediation company. The cost of professional remediation is almost always lower than the cost of fixing a DIY job that spread the problem.
— Jim
When you need professional mold removal in Chicagoland

Thecleangenius provides certified mold removal and remediation services across the greater Chicagoland area, including Arlington Heights, Schaumburg, Naperville, Wheaton, and surrounding communities. Our teams use advanced Pure Cloud dry-fog technology to reach mold in spaces that standard scrubbing cannot access, and we back every job with more than 25 years of combined experience and over 400 five-star reviews. We are available 24/7 for emergency situations and work directly with your insurance to reduce the stress of the process. If your mold problem is beyond a small DIY patch, contact Thecleangenius for a professional assessment before the situation grows.
FAQ
What PPE do I need for mold cleanup?
At minimum, wear an N-95 respirator, non-vented goggles, and long rubber or nitrile gloves. Upgrade to neoprene gloves if you are using a bleach solution.
How long does it take for mold to grow after water damage?
Mold can begin growing within 24 to 48 hours on wet porous materials. Drying affected areas within that window is the most effective way to prevent growth.
Can I paint over mold to stop it?
No. Paint applied over mold will peel as mold continues growing beneath the surface. Clean and dry the area completely before any painting or caulking.
When should I hire a professional instead of doing it myself?
Hire a certified remediation professional when mold covers more than 10 square feet, appears in HVAC systems, or is hidden inside walls and structural materials.
Does bleach kill mold permanently?
Bleach disinfects hard, non-porous surfaces after physical removal but does not penetrate porous materials. It also does not fix the moisture source, so mold will return without addressing the underlying water problem.