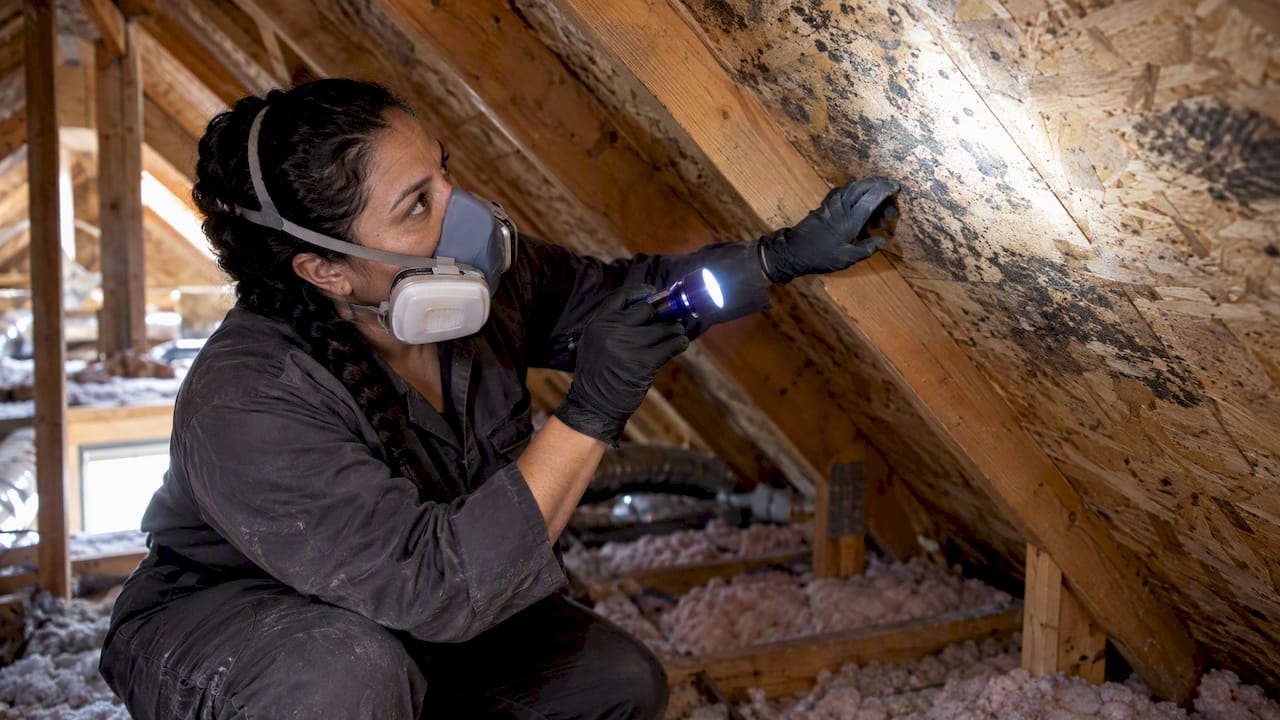

If your roof leaked and you now see fuzzy white, green, gray or black growth on the attic wood, the order of work matters: stop the water, dry everything, then remove the mold. Cleaning first while the roof still drips only buys you a few weeks. Small, surface-level patches on hard wood can be cleaned by a careful homeowner. Wet insulation, soaked plywood, widespread growth or anything you cannot fully reach is a job for a professional.
TL;DR
- Mold in an attic after a roof leak means moisture stayed long enough for growth. The leak has to be found and repaired before any cleanup counts.
- Wet materials should be dried within 24 to 48 hours, according to the EPA. After that, mold becomes likely.
- Color does not tell you whether mold is dangerous. Visible mold gets removed whatever type it is, so skip the testing kits.
- Hard surfaces can be scrubbed. Moldy insulation and badly affected plywood usually have to be removed and replaced.
- Call a professional for hidden, widespread or structural-looking damage, or when you are unsure.
Table of Contents
- How a roof leak turns into attic mold
- What roof leak mold looks like on attic wood
- Step 1: Stop the water coming in
- Step 2: Dry everything fast
- Step 3: Decide what you can clean and what must go
- Step 4: Do not pay for testing you do not need
- When to call a professional
- How to know the cleanup worked
- Keep the attic dry after the repair
- Our perspective
- Get the roof leak damage handled in one visit
- FAQ
- Sources
How a roof leak turns into attic mold
Mold needs moisture, something to eat and time. An attic supplies the second one for free: roof sheathing, rafters, insulation, cardboard boxes and the paper face of drywall are all food. A roof leak supplies the moisture. The CDC notes that mold can grow around roof leaks and on wood, insulation, drywall, cardboard and paper.
The EPA points out that attics are hidden areas often overlooked after water intrusion, and that wet areas should generally be completely dried within 48 hours. That is the problem with a slow leak. A missing shingle or failed flashing can drip onto the decking for weeks, and you only find out when a stain shows up on the ceiling below or you go up for the holiday decorations.
In the Chicago suburbs the pattern repeats every year: ice dams in late winter push meltwater under shingles, spring storms follow, and then humid summers keep the damp attic from drying. Each cycle gives mold another start.
A leak is not always the only cause
Before you blame the roof alone, know that the EPA lists several moisture sources: high humidity, condensation, plumbing leaks, insufficient insulation and moisture hidden in roof materials can all contribute. Its guidance on moisture investigations also says to check condensation, actual leaks, maintenance problems and HVAC issues, because mold returns when the source is not corrected.
A few clues help you tell a roof leak from a ventilation problem:
- Growth clustered around one spot, often under a vent pipe, chimney, valley or skylight, points to a leak.
- Dark staining across a whole roof plane, especially on the north side, points to condensation or poor ventilation.
- Frost or damp nails in winter point to warm indoor air reaching a cold roof deck.
- Mold near a bath fan duct suggests the exhaust is dumping into the attic instead of outdoors.
Our guide to why attic moisture causes mold in your home walks through these causes in more detail.
What roof leak mold looks like on attic wood
Homeowners often search for what mold looks like on plywood, because most attics have plywood or OSB decking. Attic mold can appear white, green, gray, brown or black on sheathing, rafters, framing or the attic side of ceiling drywall. On damp plywood it often shows as mixed-color speckles or patches, and the same source stresses that color and appearance do not reliably identify the mold type.
Things to look for:
- Dark or discolored patches on the underside of the roof deck, often following the line of a seam or nail row.
- A fuzzy or powdery film on rafters and framing near the leak.
- Delaminating or swollen plywood, with layers lifting at the edges.
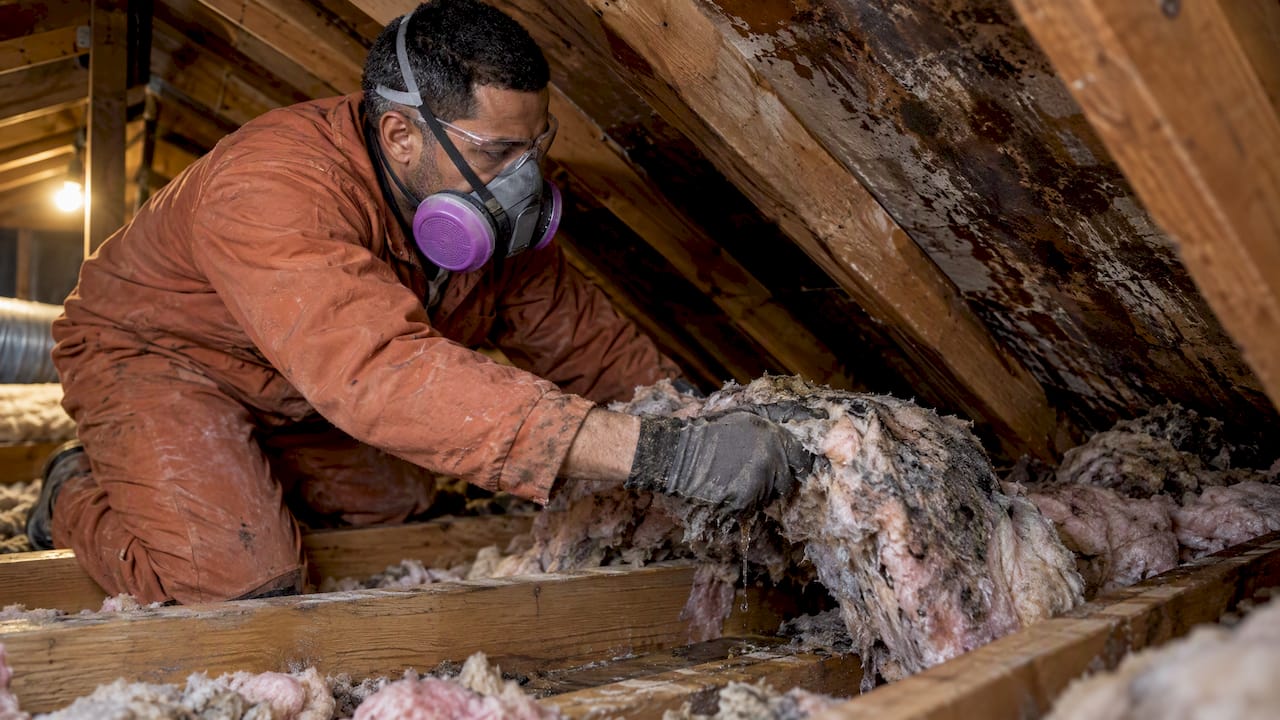
- Matted, stained or clumped insulation beneath the wet spot.
- A musty smell that gets stronger in the rooms below on humid days.
Wood is more than a surface to look at. The U.S. Department of Energy’s Building America Solution Center explains that plywood, OSB and other wood products can grow mold when moisture stays high long enough, and that soaked plywood may lose structural integrity because the adhesive bonds between plies are affected. It treats mold on wood as a sign of sustained moisture. So a patch of mold on decking tells you the water was there for a while, not just a single night.
If the growth is on insulation, the rules change, since insulation cannot be scrubbed. See our page on mold on attic insulation for how to judge it.
Step 1: Stop the water coming in
Anything you do about mold is wasted if the roof still leaks. When water is actively coming through, State Farm’s guidance is to move valuables and furniture, catch drips in containers, document the damage, use a tarp if it is safe and call a roofing specialist or a contractor for temporary repairs.
Take photos before you touch anything. If you plan to file a claim, dated photos of the leak, the stains and the wet insulation make the conversation with your insurer much easier.
Do not climb onto the roof to find it
The University of Wisconsin Extension warns against risking serious injury when inspecting or repairing a roof. It suggests using binoculars from the ground and checking the attic for a drip trail, then hiring a professional roofer unless you are experienced. In the attic, follow stains and damp wood uphill, because water often travels along a rafter before it drips, and the entry point may sit several feet above the wet spot.
If an inspection report has flagged your roof, this overview of roof issues found at a home inspection explains what common findings mean and how repairs are usually approached.
If the ceiling below is wet or sagging too, read our steps for stopping ceiling leak water damage in 24 to 48 hours. Water that reached the living space needs drying as well, not just the attic.
Step 2: Dry everything fast
The EPA’s rule of thumb is to dry wet materials within 24 to 48 hours. In an attic, that means removing standing water, pulling out soaked insulation, opening the space to airflow and running dehumidification where it is practical. Attics are hard to dry on your own: they are hot, cramped and poorly lit, and the wet material is often tucked under the roof slope.
Professional crews use air movers and dehumidifiers sized to the space. If you want to understand what that equipment does, our page on the role of dehumidifiers in water restoration explains it. For the first hours after any water intrusion, our emergency water damage response steps give a checklist.
Step 3: Decide what you can clean and what must go
Here is the practical dividing line.
| Material | Typical approach |
|---|---|
| Sound, lightly affected framing and sheathing | Clean with detergent and water, then dry completely |
| Moldy insulation | Remove, bag and replace |
| Cardboard, stored paper, fabric | Discard if moldy |
| Delaminated or soft plywood | Professional assessment, likely replacement |
| Mold on ceiling drywall from above | Professional assessment, often removal |
The EPA’s homeowner guide says to scrub hard surfaces with detergent and water and discard moldy porous materials that cannot be cleaned. The Building America Solution Center also advises not installing lumber, plywood or other building materials that show visible water damage or mold, which matters if you are about to replace a section of decking or add new insulation.
The Massachusetts homeowner guide adds that detergent and water generally suffice, harsh chemicals and biocides are usually unnecessary, and moldy items should be bagged and sealed before removal. Cleaned areas should again be dried completely within 24 to 48 hours.
What about bleach?
Search results are full of arguments about bleach on attic wood. The CDC’s position is that visible mold should be removed without needing to identify its type, and that hard surfaces can be cleaned with household products, soap and water, or no more than 1 cup of laundry bleach per gallon of water. The same page says never to mix bleach with ammonia or other cleaners, and to ventilate and wear rubber boots, gloves and goggles. Porous wood is the weak spot for any liquid treatment, which is another reason detergent, scrubbing and thorough drying matter more than a stronger chemical.
Protect yourself in the attic
Attics add their own hazards on top of mold: heat, low headroom, exposed nails, and no floor in many spots. Step only on framing, never between joists. Wear eye protection, gloves and a respirator rated for the job, and keep the work short. Stir up dust and you spread spores into the rest of the house. Our mold removal safety best practices cover the gear and habits in more detail.
Step 4: Do not pay for testing you do not need
Many homeowners ask if they should test. The Massachusetts guide notes there are no federal or state standards defining a universally safe amount of mold and does not recommend air testing or bulk sampling just to identify types or quantities. Its homeowner perspective is that money is better spent finding and fixing the moisture, cleaning, drying and watching for recurrence.
So the question to answer is not “which mold is it?” but “how much is there, how wet is the wood behind it, and has the water source been fixed?” A good contractor answers those on site.
When to call a professional
The EPA advises considering an experienced professional for hidden mold, extensive contamination or when in doubt, and consulting a structural engineer or other professional if mold may have damaged building integrity. In an attic after a roof leak, that translates into a short list:
- The growth covers a large part of the decking or has spread beyond the leak area.
- Insulation is wet or moldy across more than a small patch.
- Plywood is soft, delaminating or sagging.
- The leak happened above a finished ceiling and you suspect wet drywall or insulation you cannot see.
- Someone in the home has breathing problems or health complaints that seem tied to the space, in which case also talk with a physician.
- You cannot reach the affected areas safely.
The same EPA guide describes a proper job as one that uses containment and protective equipment as appropriate and removes moldy building materials carefully, rather than just coating what you see. Our pages on why mold remediation requires containment and how the attic mold removal process works show what that looks like in practice. If you want a sense of the budget, read what U.S. homeowners pay for attic mold remediation.
How to know the cleanup worked
The EPA says cleanup is not finished until the moisture problem is fixed, visible mold and mold odors are gone, there is no renewed water damage or mold, and the area can be occupied without health complaints. It also notes that staining may remain as cosmetic damage, so a faint shadow on wood that is dry, hard and clean is not automatically a failure.
Recheck after the next heavy rain and again after the first thaw. A flashlight and a few minutes at the hatch is enough: look for new stains, damp insulation, and any musty smell. Our article on why remediation fails and mold comes back explains the usual culprit, which is an unfixed water source.
Keep the attic dry after the repair
The CDC recommends keeping indoor humidity no higher than 50%, using air conditioning or dehumidification, venting kitchen and bathroom exhaust outdoors, and fixing roof, wall and plumbing leaks. The EPA adds gutter maintenance to the list. For an attic, these habits make the biggest difference:
- Check that bath fans and range hoods vent outdoors, not into the attic.
- Keep gutters clear so water does not back up under the lower shingles.
- Look at the attic after every major storm for the first season.
- Seal the air leaks between the living space and the attic before adding insulation, so warm moist air does not reach the cold roof deck.
- Keep stored items off the floor and out of cardboard.
For a full plan, see our attic mold prevention guide for homeowners, and for the insulation side, attic insulation types. If old insulation has to go first, read how to remove old attic insulation safely.
Our perspective
Most attic mold calls we hear about start the same way: a small leak that was patched, but the wet insulation and damp decking were left behind. The roof looks fixed, and the mold keeps going.
We think the roof, the drying and the mold removal have to be treated as one job. That is why we look at moisture first, protect the rest of the house with containment, and remove what cannot be cleaned instead of painting over it. Our non-toxic dry-fog approach with Pure Cloud technology is built for the places a scrub brush cannot reach in a tight attic.
If you are unsure whether your patch is small enough to handle yourself, an on-site look costs you very little compared with finding out later that the sheathing was soft. We work with your insurance directly, and we answer emergencies around the clock.
Jim
Get the roof leak damage handled in one visit
We are a family-owned restoration company serving Chicagoland, and we handle the wet side and the mold side of a roof leak together: water damage drying, attic mold removal and remediation, and coordination with your insurer. If water is still coming in or your ceiling is damp, start with our roof leak water damage restoration service.

You can also reach us any time through The Clean Genius. We serve Arlington Heights, Naperville, Schaumburg, Palatine, Elgin, Wheaton and many other nearby towns.
FAQ
Can a small roof leak cause mold in the attic?
Yes. Even a slow drip can keep roof sheathing or insulation damp long enough for mold. The EPA says wet materials should be dried within 24 to 48 hours, or mold becomes likely. Small leaks are often worse in one respect: they go unnoticed for weeks.
Is attic mold from a roof leak dangerous?
Mold can cause health complaints in some people, and the CDC says visible mold should be removed whatever its type. If anyone in your home has asthma, allergies or breathing problems, talk with a doctor and have the attic assessed. Wear protective gear if you go up there yourself.
Do I need to replace the plywood?
Not always. Sound, hard wood with light surface growth can often be cleaned and dried. Plywood that is soft, swollen or delaminating may have lost strength, so have a professional roofer or restoration contractor look at it before deciding.
Should I fix the roof or remove the mold first?
Fix the leak first, or at least stop the water with a temporary repair, then dry and clean. If you remove mold while water still gets in, the growth is likely to return.
Will my homeowners insurance cover it?
Coverage depends on your policy and on the cause of the leak, so read it or ask your insurer. Take dated photos before any cleanup and keep records of repair work. We can coordinate directly with your insurance company during the restoration.
Sources
- A Brief Guide to Mold, Moisture and Your Home, US EPA
- Mold Course Chapter 9, US EPA
- Mold Remediation in Schools and Commercial Buildings Guide, Chapter 3, US EPA
- Mold, CDC
- No Visible Signs of Water Damage or Mold on Materials, Building America Solution Center
- Mold Cleanup, Repairs, and Excess Moisture Control, Massachusetts
- Assessing and Repairing Leaky Roofs, University of Wisconsin Extension
- Leaking Roof: Here’s What to Do, State Farm
- Attic Mold Identification Photographs and Methods, InspectApedia