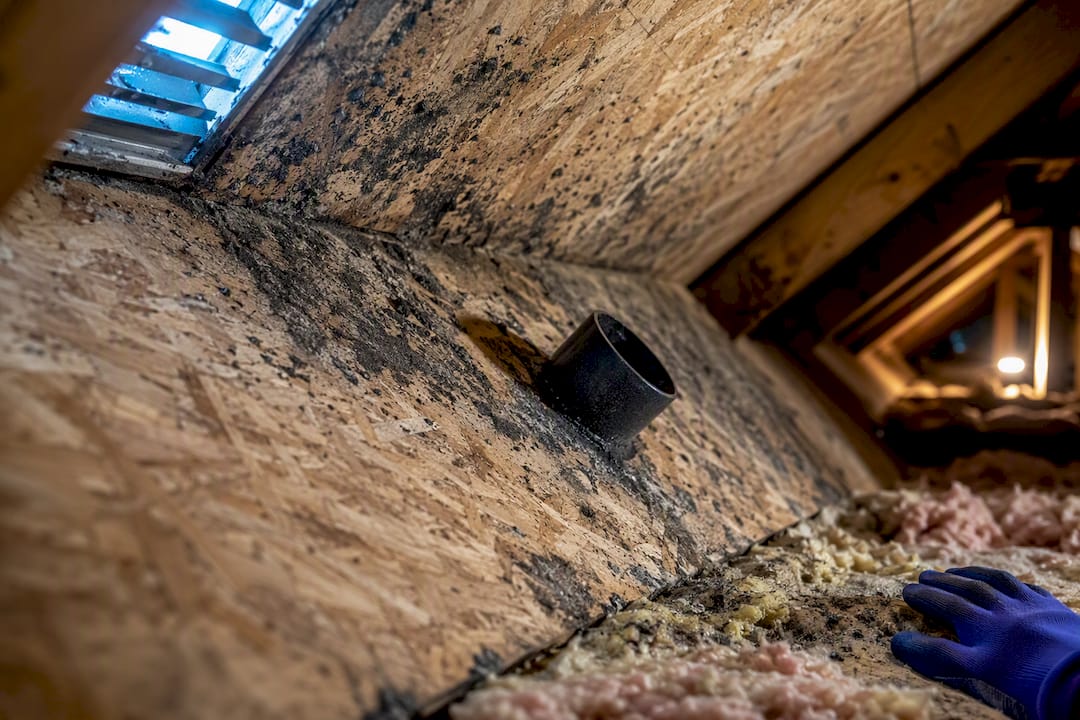

Mold on attic sheathing is almost always a moisture problem, not a “toxic black mold” emergency. The first move is to find and stop whatever is feeding it moisture, whether that’s a bathroom fan dumping humid air into the attic, a blocked soffit, or a slow roof leak. If the growth is small, sitting on hard sheathing rather than porous insulation, and the moisture source is already fixed, a careful homeowner can often clean it. Anything larger, recurring, or tied to a leak you haven’t traced yet calls for a professional look.
TL;DR:
- Most attic mold results from condensation caused by interior air leaks, misrouted exhaust ducts, or blocked ventilation, not roof leaks or toxic black mold.
- Active mold typically appears as textured, fuzzy spots in patterns near the ridge or roof penetrations, with moisture content above 20 percent and rusty nails indicating ongoing humidity.
- Removing mold requires fixing moisture sources first, then mechanically cleaning the wood, sealing residual stains, and verifying dryness with seasonal moisture logs; bleach is ineffective.
- DIY cleanup is suitable only for small patches under 10 square feet on hard sheathing, while larger or high-risk situations should involve professional remediation teams.
- Proper attic ventilation depends on balanced soffit intake and ridge or gable exhaust; in humid regions, increasing vents can worsen mold if air sealing isn’t prioritized.
Table of Contents
- What Attic Sheathing Mold Looks Like (and How to Tell It’s Active)
- Why Mold Forms on the Underside of Roof Sheathing
- How Serious Is It, and Should You DIY or Call a Pro?
- Removing Mold From Attic Sheathing: A Safe Sequence
- The Fixes That Actually Keep Mold From Coming Back
- What Attic Inspections Actually Turn Up in the Field
- Health Risks From Attic Mold and How to Inspect Safely
- The Types of Mold You’ll Actually Find Up There
- How to Confirm the Mold Is Actually Gone
- Why Ventilation Design Makes or Breaks Attic Mold Control
- Fix the Pathway, Not Just the Stain
- Getting Professional Help for Attic Mold in Your Home
- Sources
- FAQ
What Attic Sheathing Mold Looks Like (and How to Tell It’s Active)
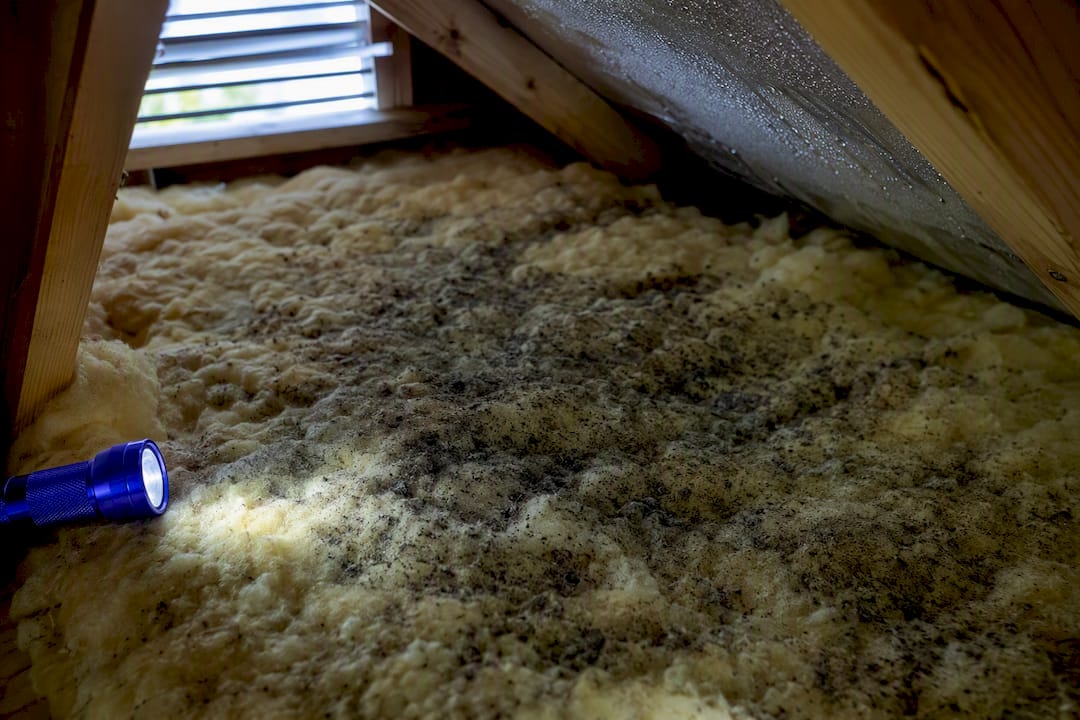
Active mold on roof sheathing usually shows up as black, gray, or greenish speckling that follows a pattern, not random splotches. Condensation-driven growth tends to cluster near the ridge, around roof penetrations, and on the north-facing or shaded slopes where sheathing stays coolest longest. Leak-driven staining, by contrast, usually radiates outward from one specific spot, often with a darker halo and sometimes with sagging or discolored insulation directly underneath.
Old staining from a leak that was fixed years ago looks flat and dry, almost like a water stain on a ceiling. Active growth has texture: a fuzzy, powdery, or slightly raised surface that smears or transfers when lightly touched with a gloved finger. That single test tells you more than a visual scan alone.
A moisture meter is the most useful $30 tool for this job. Wood moisture content near or above 20 percent, or surface relative humidity staying above roughly 80 percent, signals conditions where active growth is likely rather than just possible, according to building-science guidance on attic causes. Rusty or corroded nail tips poking through the sheathing are another reliable tell. That corrosion only happens with sustained humidity, so a field of rusty nail heads is often a faster clue than the mold itself.
Where to check first:
- The sheathing underside near the ridge and at roof penetrations (vents, chimneys, skylights)
- Rafters and the roof deck directly above bathroom and kitchen exhaust fan locations
- Around the attic hatch or pull-down stair, where warm house air leaks in most easily
- The top of the insulation layer, checking for compression, dark staining, or a musty smell
Pro Tip: Bring a flashlight with a raking angle, not a straight-on beam. Shining light sideways across the sheathing makes fuzzy, three-dimensional mold texture pop against flat old staining in a way a head-on light misses entirely.
Field tests have limits. A moisture meter tells you conditions right now, not history, and a visual check can’t confirm species or how deep the growth has penetrated the wood grain. For anything beyond a small, isolated patch, that uncertainty is exactly why a second opinion earns its cost.
Why Mold Forms on the Underside of Roof Sheathing
Condensation is the dominant cause, not roof leaks. Warm, moisture-laden air from inside the house rises into the attic, hits the cold underside of the roof deck, and drops its moisture right there as condensation. This happens every winter in most northern climates unless the attic is properly sealed and vented, and it’s the reason sheathing mold shows up even in homes with a roof that has never leaked.
Four mechanisms account for most cases:
- Interior air leakage. Gaps around the attic hatch, recessed lighting, plumbing stacks, and top plates let warm, humid house air pour into the attic all winter.
- Misdirected exhaust ducts. Bathroom fans, dryer vents, and range hoods that terminate in the attic or soffit cavity, instead of outside the building, are one of the most common defects found on inspection.
- Broken ventilation loops. Blocked soffit intake, missing baffles, or an intake/exhaust imbalance stop the attic from flushing out the moisture that does get in.
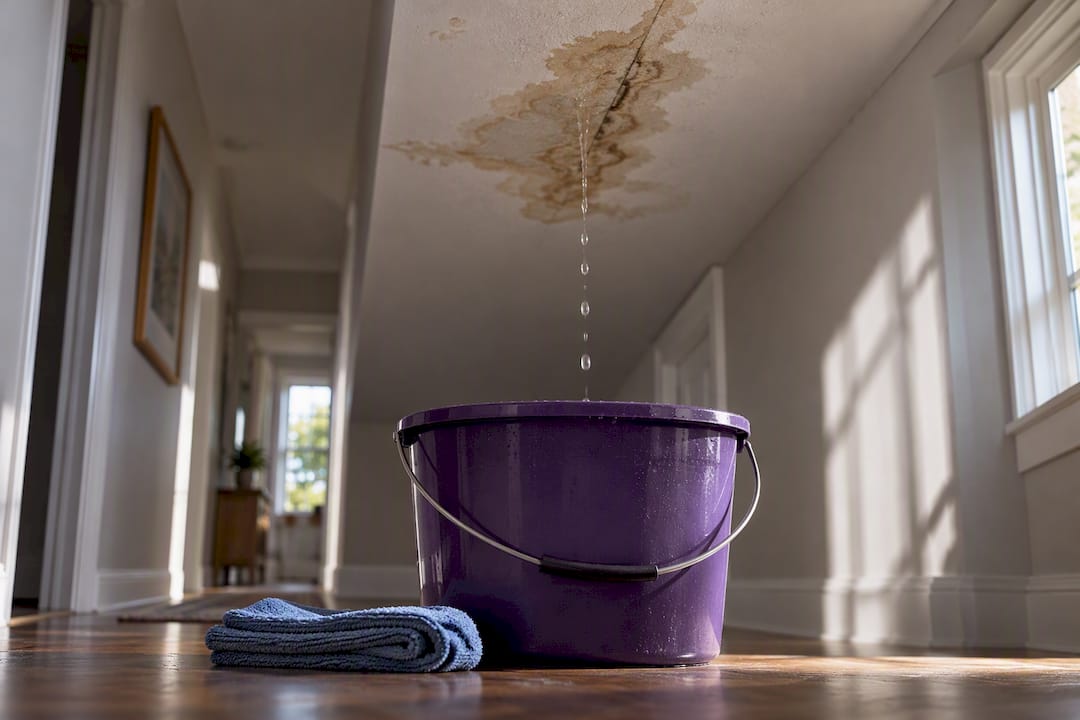
- Localized leaks. Roof leaks and ice-dam backup create a concentrated, radiating stain pattern rather than the broad, ridge-line pattern condensation produces.
Here’s the wrinkle most articles skip: more ventilation isn’t automatically the fix. In cool, humid climates, night-sky radiative cooling can chill the roof deck below the surrounding air temperature after dark, and pumping more outside air through a vented attic can actually make sheathing mold worse rather than better, according to Green Building Advisor’s reporting on Pacific Northwest cases. That’s a real exception to the standard “just add vents” advice, and it’s why diagnosing the actual moisture pathway matters more than defaulting to a generic fix.
Interior air leakage, misrouted ducts, and blocked intake are collectively the most common root causes identified in the field, ahead of actual roof leaks, based on moisture-and-mold field data. If your attic is over a finished, humid bathroom, or your dryer vent disappears into the attic instead of exiting through the wall or roof, you’ve likely found your source before you even climb the ladder. Curious how this plays out room by room? This breakdown of attic moisture sources walks through the household patterns that feed it.
How Serious Is It, and Should You DIY or Call a Pro?
Size is the first filter. Mold covering less than roughly 10 square feet of sheathing, on hard wood rather than insulation, with the moisture source already identified and fixed, is generally within DIY range for a healthy adult. Above that threshold, or if anyone in the house has asthma, a compromised immune system, or mold allergies, hire a professional regardless of size.
A few signals mean you should stop cleaning and start calling:
- The insulation itself is wet, matted, or smells musty. Fiber insulation traps spores in a way bare wood doesn’t, and it typically has to be removed rather than cleaned.
- The sheathing feels soft, spongy, or shows visible delamination. That’s structural, not cosmetic, and outside cleaning scope entirely.
- You notice a musty smell inside living spaces, not just the attic, which suggests attic air is finding its way down through light fixtures or the attic hatch.
- You can’t identify the moisture source. Cleaning without fixing the cause just buys you a repeat job in a year.
Photograph everything before you touch it, with a date stamp and a note on suspected cause, especially if a roof leak is involved. Homeowners insurance sometimes covers mold remediation when it results from a sudden covered event like storm damage to the roof, but generally excludes mold from long-term condensation or neglected maintenance, so documentation of the trigger matters for any claim. If you’re not sure which category you’re in, a professional inspection or moisture assessment before you file anything protects you either way, and it’s worth reviewing what typically drives cost before that call so you know what to expect. Persistent musty smell reaching living spaces is also a strong argument for professional air quality testing, not just visual cleanup, and it’s worth reading how attic mold can affect indoor air quality before deciding to wait it out.
Removing Mold From Attic Sheathing: A Safe Sequence
Order matters more than product choice here. Skipping step one and jumping straight to scrubbing is the single most common mistake homeowners make, and it guarantees the mold returns.
- Confirm the moisture source is actually fixed. Don’t clean until the fan is re-routed, the leak is patched, or the soffit is unblocked. Cleaning first is just cosmetic maintenance on a recurring problem.
- Remove and bag wet or contaminated insulation. Fiberglass and cellulose trap spores in their fibers, and drying them out rarely restores them to a clean baseline.
- Contain the work area. Seal the attic hatch opening with plastic sheeting and tape before disturbing any mold, so spores don’t spread into the living space below.
- HEPA vacuum loose surface spores before any scrubbing begins, to cut down what becomes airborne once you start agitating the surface.
- Mechanically clean the wood. Wire brushing, fine sanding, or soda/media blasting on stubborn areas is what actually lifts mold out of the wood grain.
- Apply an encapsulant if desired, once the wood is fully dry, to seal remaining stains and add a moisture-resistant barrier.
- Verify dryness, then re-insulate. Don’t close the attic back up until moisture readings confirm the wood has returned to a safe range.
Bleach and off-the-shelf mold sprays are popular and mostly ineffective on sheathing, because they sit on the surface without penetrating the wood grain where mold actually roots. That’s why a “successful” bleach cleaning often looks fine for a few months and then comes right back, according to remediation guidance from InspectandTest. Mechanical removal, not chemistry, is what actually works on wood.
DIY has real limits. Attic spaces are hot, cramped, and poorly lit, and disturbing mold without a properly fitted N95 or P100 respirator, goggles, and gloves puts spores directly into your breathing zone. If the attic has limited walking space, low headroom, or you’d be working alone above the ceiling of a finished room, the risk of a fall or a knee through the drywall often outweighs the savings of skipping a professional.
Pro Tip: Never run a box fan in the attic to “dry things out” during cleanup. It’s the fastest way to blow spores into the insulation, the soffit vents, and sometimes straight down into the living space through can lights.
Certified remediation crews follow roughly the same sequence but with equipment homeowners don’t have: negative air machines that keep spores from migrating during work, continuous moisture logging to confirm the space is actually drying rather than just looking dry, and direct coordination with your insurance adjuster when the cause traces back to a covered event. That combination is why professional jobs on anything beyond a small patch tend to hold up long-term instead of resurfacing next winter. You can see how that professional remediation process actually unfolds before deciding which path fits your situation.
The Fixes That Actually Keep Mold From Coming Back
Cleaning without fixing the ventilation and air-sealing problem underneath it is the number one reason attic mold returns. These are the fixes that address the actual pathway, not just the symptom.
Air sealing comes first, because it stops warm, humid house air from ever reaching the cold roof deck. Focus on the attic hatch or pull-down stairs (weatherstripping and a insulated cover), recessed light housings (airtight covers or gaskets), top plates where interior walls meet the attic floor (caulk or expanding foam), and any plumbing or wiring chases running from living space into the attic.
Duct routing is the fix homeowners most often discover is broken only after a mold problem forces them to look. Bath fans, dryer vents, and range hoods need to terminate outside the building envelope, not in the attic or a soffit cavity, and the ductwork itself should be insulated and sloped slightly downward toward the exterior so condensation inside the duct drains out rather than dripping back into the attic.
Ventilation balance is the piece most DIY fixes get backward. Check that soffit vents actually show daylight from inside the attic in every bay, not just at the ends. Missing baffles are one of the most overlooked causes of blocked intake, since insulation shifts and buries the soffit opening over time even when the vent itself is unobstructed. Intake at the soffit needs to roughly match or exceed exhaust at the ridge or gable for the airflow loop to actually function, according to ventilation-balance research.

Wet or compressed insulation generally needs full replacement, not drying in place, since crushed fibers lose their R-value permanently and contaminated fibers rarely clean up fully. After the fix is in, recheck moisture content with a meter across at least one full heating season; readings that stay comfortably under that 20 percent threshold through winter confirm the pathway is actually closed, not just temporarily quiet. A seasonal prevention checklist is worth keeping on hand for that follow-up check.
What Attic Inspections Actually Turn Up in the Field
The same handful of defects show up again and again on attic inspections, and most of them are invisible from the ground.
- Bathroom fans venting into the soffit cavity instead of through a dedicated roof or wall cap, quietly recirculating humid air back into the attic
- Soffit vents fully blocked by insulation that has shifted or was blown in without baffles to hold it back
- Baffles crushed or missing entirely at the eaves, which kills intake airflow even when the soffit vent itself looks clear from outside
- Insulation that’s damp or matted directly under a roof penetration, marking exactly where a leak or condensation point has been active longest
The standard sequence on a job like this starts with diagnosis, not cleaning: tracing every exhaust duct to its actual termination point, checking soffit-to-ridge airflow balance, and logging moisture readings across several spots on the sheathing before touching anything. That order matters because treating the mold before fixing the airflow or duct problem just resets the clock on a recurring issue.
Homeowners can speed up that first visit considerably by having a few things ready: dated photos of any visible staining or growth, a rough timeline of when a musty smell or visible spot was first noticed, and clear attic access (a pull-down ladder that actually opens, or a hatch that isn’t blocked by stored boxes).
Health Risks From Attic Mold and How to Inspect Safely
Attic mold exposure is mostly a respiratory issue, not a mystery illness. Airborne spores can trigger allergic reactions, aggravate asthma, and irritate the eyes, throat, and sinuses, with the risk scaling up for anyone with existing respiratory conditions, young children, or a compromised immune system.
The exposure risk isn’t constant. It spikes sharply the moment mold gets disturbed, whether that’s a homeowner poking around with a flashlight or a crew starting demolition, because agitation throws spores that were otherwise sitting still into the air you’re breathing. That’s the entire reason for containment and respirators during cleanup, not a formality.
Before you go up there yourself, wear at minimum an N95 respirator (a P100 is better for anything beyond a quick look), safety goggles that seal against the face, and disposable gloves. Skip the inspection entirely if you’re pregnant, immunocompromised, or have a diagnosed mold allergy, and send someone else or call a professional instead.
Keep the attic hatch closed while you’re not actively working, and avoid running the house’s HVAC system during any extended inspection or cleanup, since a return duct running through or near the attic can pull disturbed spores into the air circulating through the rest of the house. If you smell mustiness inside living spaces during or after an attic visit, that’s a sign spores may already be migrating, and it’s worth having indoor air quality checked rather than assuming it’s contained upstairs.
The Types of Mold You’ll Actually Find Up There
Almost everything found on attic sheathing falls into the mildew category rather than the toxic species that get all the headlines, according to Inspectapedia’s field identification guidance. This is cosmetic surface staining, not the kind of wood-destroying fungus that compromises structural integrity.
That distinction matters practically because testing species rarely changes what you do next. Whether a lab comes back with Cladosporium, Aspergillus, or another common attic species, the remediation steps are the same: diagnose and fix the moisture source, then clean or replace the affected materials. Species testing adds cost and delay without changing the game plan in the vast majority of cases.
The one scenario where species and severity genuinely diverge from typical staining is when the sheathing itself shows delamination, softness, or visible rot. That signals a wood-destroying fungus has been active long enough to affect structural integrity, not just the surface, and that calls for a structural assessment in addition to mold remediation. Short of that, save the money a lab test would cost and put it toward fixing the ventilation or duct problem that’s actually driving the mold.
How to Confirm the Mold Is Actually Gone
Visual inspection alone can’t tell you whether a remediation job worked. The wood can look clean and dry the day the crew leaves and still redevelop a problem within a season if the underlying moisture pathway wasn’t actually fixed.
Moisture logging over multiple wet and dry cycles, not a single reading, is the verification method that actually holds up. Checking the sheathing’s moisture content once in spring, once mid-summer, and again as the weather turns colder gives you a realistic picture of whether the fix is holding across seasonal humidity swings, rather than one favorable snapshot. Readings that stay well under the roughly 20 percent moisture threshold across that stretch are the clearest sign the airflow and air-sealing corrections are doing their job.
Smell is a simpler but useful secondary check. A musty odor returning in the attic, or worse, becoming noticeable in a room below, is often the earliest warning sign that moisture is building again, even before visible staining reappears. Re-inspect the sheathing visually at least once each season for the first year after remediation, paying particular attention to the same spots that were originally affected, since a moisture pathway that wasn’t fully corrected tends to reproduce mold in the exact same location.
Why Ventilation Design Makes or Breaks Attic Mold Control
Attic ventilation exists to do one job: flush out the moisture that inevitably finds its way in, whether from minor air leaks, seasonal humidity, or everyday cooking and showering downstairs. When that airflow loop works, moisture never gets the chance to build up on the sheathing long enough to feed mold. When it’s broken, even a small ongoing leak becomes a persistent problem.
The loop only works when soffit intake and ridge or gable exhaust are properly balanced, meaning intake volume needs to roughly match or exceed exhaust volume for continuous airflow to actually happen. A home with a generous ridge vent but blocked or insufficient soffit intake isn’t ventilated at all in any meaningful sense. It’s just got an exhaust with nothing feeding it.
Optimizing that system starts with confirming daylight is visible at the soffit from inside the attic in every single rafter bay, not just a handful. Install or replace baffles anywhere insulation has crept over the vent opening, since that’s the single most common way an otherwise functional soffit stops moving air. From there, confirm the ridge or gable exhaust isn’t oversized relative to available intake, which can actually pull conditioned air out of the living space through leaks rather than pulling attic air out through the vent as intended.
One caveat worth repeating: in cool, humid climates, more ventilation isn’t automatically better, since night-sky radiative cooling can drop sheathing temperature below the surrounding air after dark. In those specific conditions, air sealing the attic floor and controlling the moisture source often does more good than opening up additional vents.
Fix the Pathway, Not Just the Stain
The advice that gets this topic wrong most often is the instinct to treat attic sheathing mold as a cleaning problem first. It isn’t. It’s a symptom of a broken air pathway, whether that’s a duct dumping humid air where it shouldn’t be, a soffit that’s quietly lost its intake, or a house leaking warm air into a cold attic all winter. Clean the stain without fixing that pathway, and you’ve bought yourself a repeat job, usually within a year or two.
Conventional advice leans hard on “add more ventilation,” and in most climates that’s reasonable. But the exception matters: in cool, humid regions where night-sky cooling drops sheathing temperature after dark, more airflow can make things worse, not better. That nuance rarely makes it into general cleaning guides, and it’s exactly the kind of detail that separates a durable fix from a homeowner who’s still scrubbing the same rafter bay three winters running.
If you take one thing from this, prioritize diagnosis over demolition. Trace the ducts. Check the soffits. Confirm the air sealing. The cleaning step is the easy part.
— Jim
Getting Professional Help for Attic Mold in Your Home
Once you’ve spotted mold beyond a small, easily accessible patch, or you’re not confident you’ve traced the moisture source correctly, that’s the point to bring in a crew that does this daily rather than pushing through it alone.

Thecleangenius handles the full scope this kind of problem usually requires: attic mold removal, insulation removal and replacement when fibers are contaminated, and roof leak water damage restoration when the moisture source turns out to be a leak rather than condensation. Because the team has experience with this combination of problems, an on-site estimate typically includes a full duct and ventilation trace, not just a mold scrape, so the root cause gets fixed alongside the visible growth. Insurance coordination is handled when the cause ties back to a covered event like storm or roof damage, and the crew is available for emergencies.
After remediation, expect a verification pass, moisture readings confirming the sheathing has dried and stayed dry, not just a visual check the day the crew packs up. If you’ve found staining, a musty smell, or visible growth in your attic, request an on-site estimate through Thecleangenius’s mold removal and remediation page and get a real diagnosis before the problem gets bigger than a weekend project.
Sources
- Moldy roof sheathing in the Pacific Northwest — GreenBuildingAdvisor
- Attic Mold Identification — Inspectapedia
- Mold remediation in the attic — InspectandTest
- What causes mold in attic (MoldRemovalHub)
FAQ
How serious is mold in an attic?
Most attic sheathing mold is mildew-type surface staining rather than a structural or acutely toxic threat, but it still signals a moisture problem that will keep spreading until the source is fixed. It becomes serious when insulation is contaminated, the wood shows delamination, or attic air is reaching living spaces.
How can I remove mold from attic plywood?
Confirm the moisture source is fixed first, then contain the area, HEPA vacuum loose spores, and mechanically clean the surface with a wire brush, sanding, or media blasting rather than bleach, since bleach doesn’t penetrate wood grain effectively. An encapsulant afterward can seal remaining staining once the wood is fully dry.
Is mold in the attic covered by homeowners insurance?
Coverage generally depends on the cause: mold resulting from a sudden covered event like storm or roof damage is often covered, while mold from long-term condensation or deferred maintenance typically is not. Photographing the damage and identifying the cause before filing gives you the best shot at a fair review.
Why am I getting mold in my attic?
The leading causes are warm, humid interior air leaking into the attic, bathroom or dryer exhaust ducts terminating in the attic instead of outside, and blocked soffit intake or missing baffles that stop proper airflow. Roof leaks and ice-dam backup cause it too, but usually show a localized stain pattern rather than the broad, ridge-line pattern condensation creates.